XP-82 Twin Mustang – October, 2017 – Restoration Update

Tom Reilly getting settled into the pilot's seat for the engine run-up on October 17th! (photo via Tom Reilly)
United Fuel Cells


Tom Reilly getting settled into the pilot's seat for the engine run-up on October 17th! (photo via Tom Reilly)
Tom Reilly getting settled into the pilot’s seat for the engine run-up on October 17th! (photo via Tom Reilly)

WarbirdsNews has received the latest XP-82 Twin Mustang restoration update from Tom Reilly at his workshop in Douglas, Georgia, and we thought you would all be pleased to see the latest progress! As we mentioned in our last update in early July, since the project is coming very close to completion, there are fewer major accomplishments that can be photographed, which means that our usual monthly reports will happen more infrequently, hence the two month gap since the last posting. This does not mean that plenty isn’t happening on the resurrection of XP-82 Twin Mustang 44-83887, just that only some of it can be documented easily. This restoration update will mostly consist of a photo-essay with captions to show which areas have been receiving attention most recently.

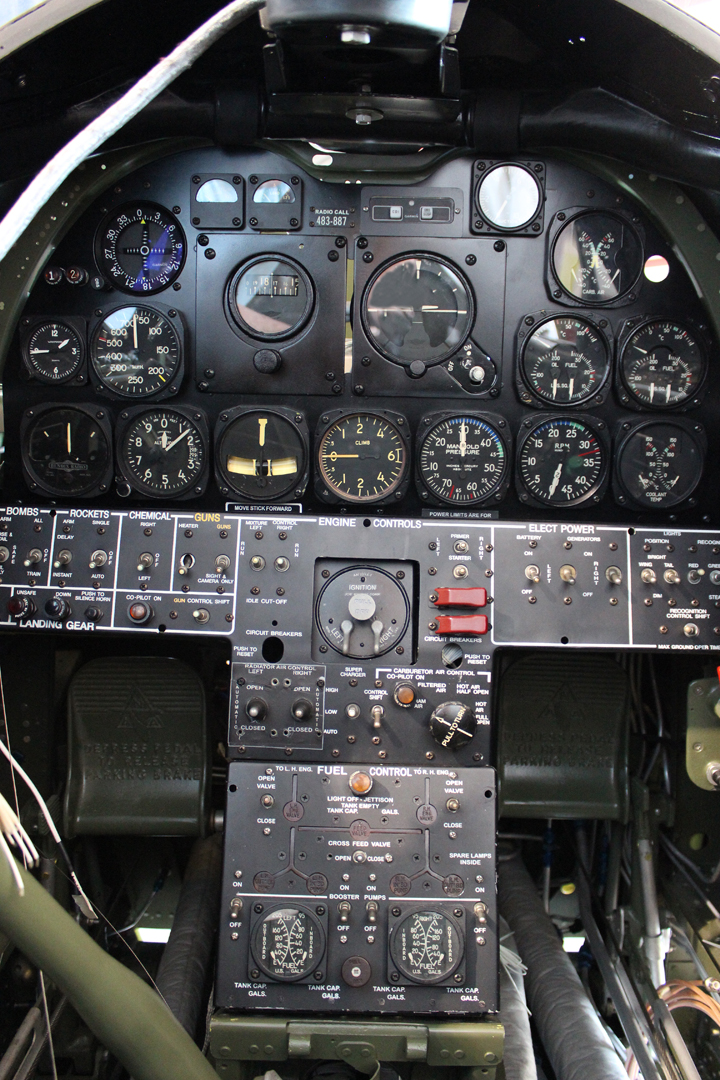
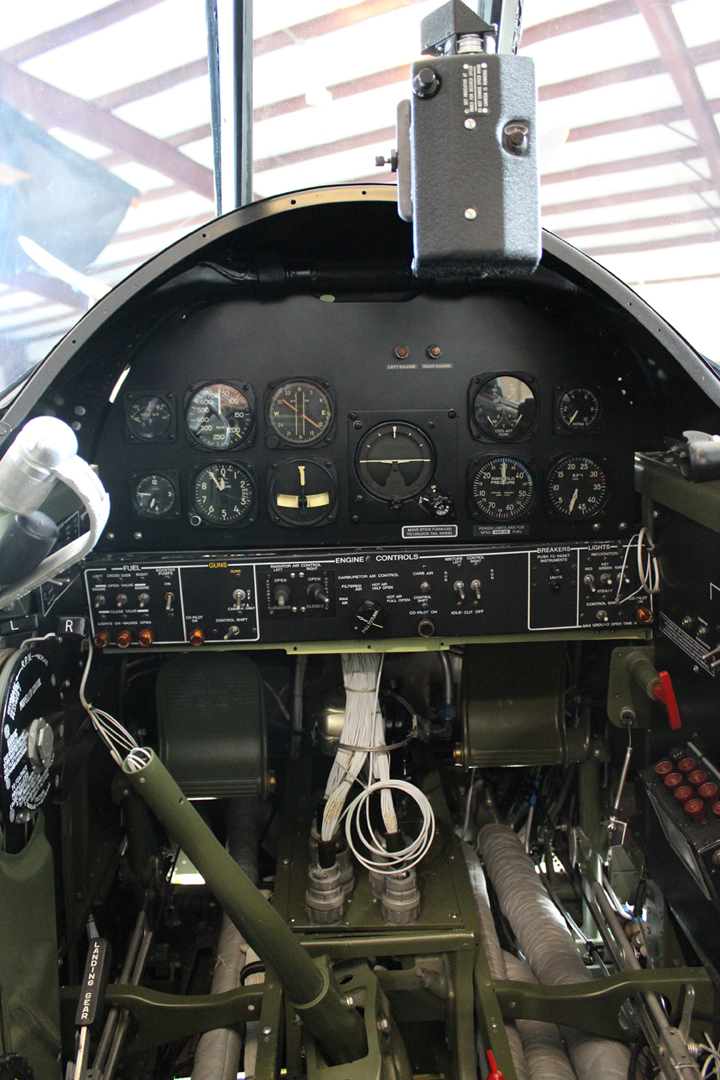
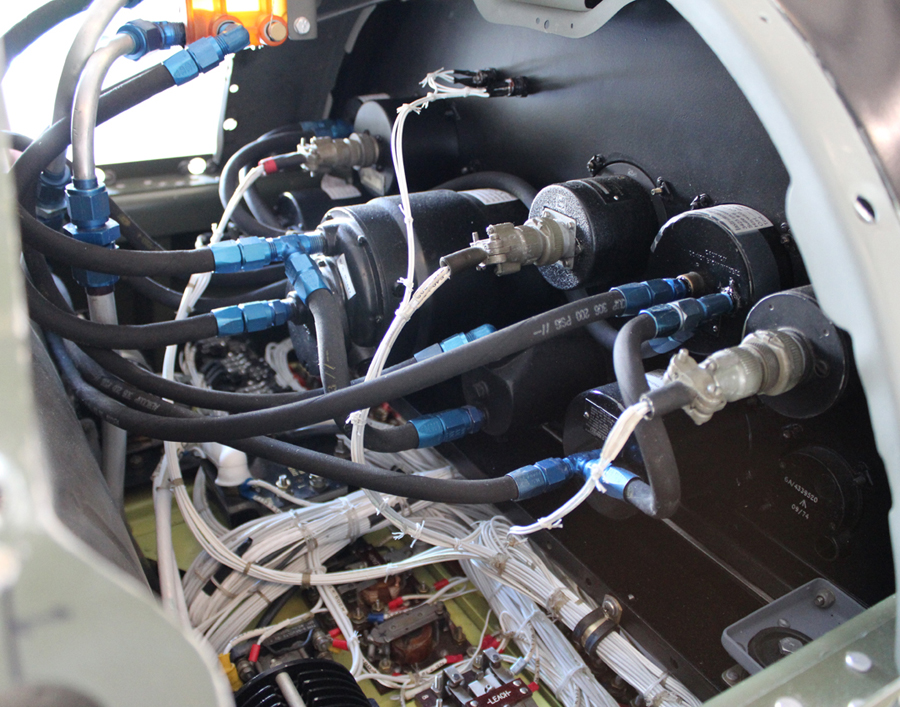
Cockpit Instrument Panels
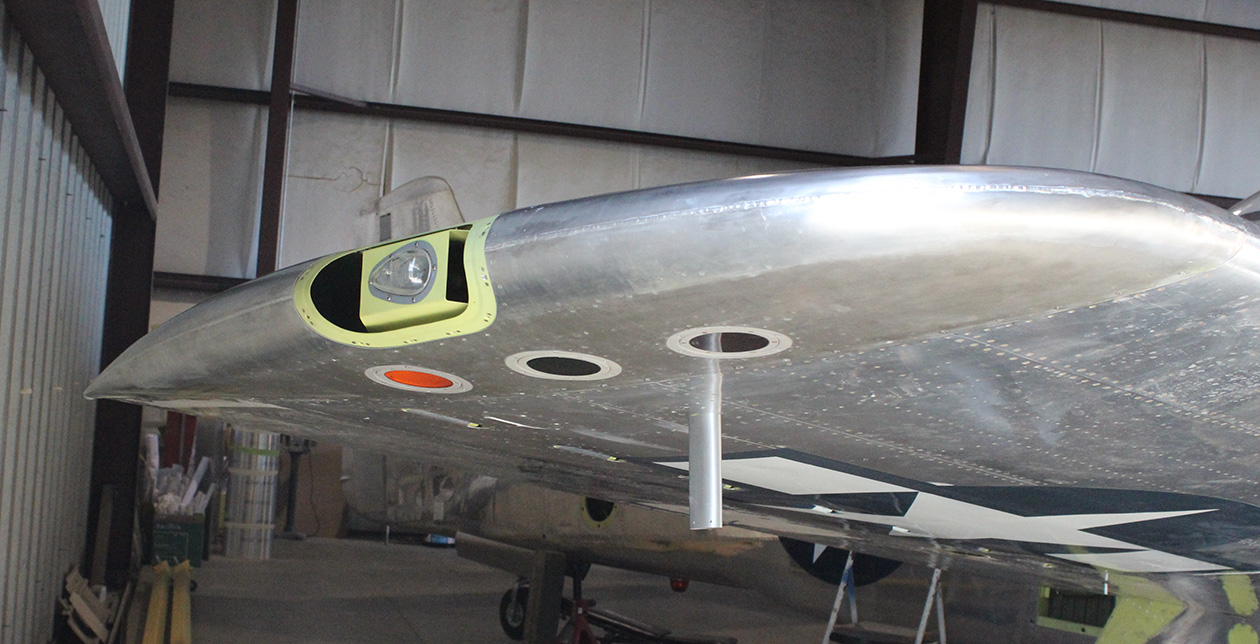
Pilot’s instrument panel installed. The loose wires are avionics (radio) wires which still require hooking up. (photo via Tom Reilly)

Hoses and wiring behind the pilot's instrument panel. (photo via Tom Reilly)
Hoses and wiring behind the pilot’s instrument panel. (photo via Tom Reilly)

Co-pilot’s instrument panel installed. Note gun strike camera mounted. (photo via Tom Reilly)

Hoses and wiring behind the co-pilot's instrument panel. (photo via Tom Reilly)
Hoses and wiring behind the co-pilot’s instrument panel. (photo via Tom Reilly)

Wingtip Lighting

Left-hand wing tip with position light installed. (photo via Tom Reilly)

Right-hand wing with position and recognition lights installed. (photo via Tom Reilly)

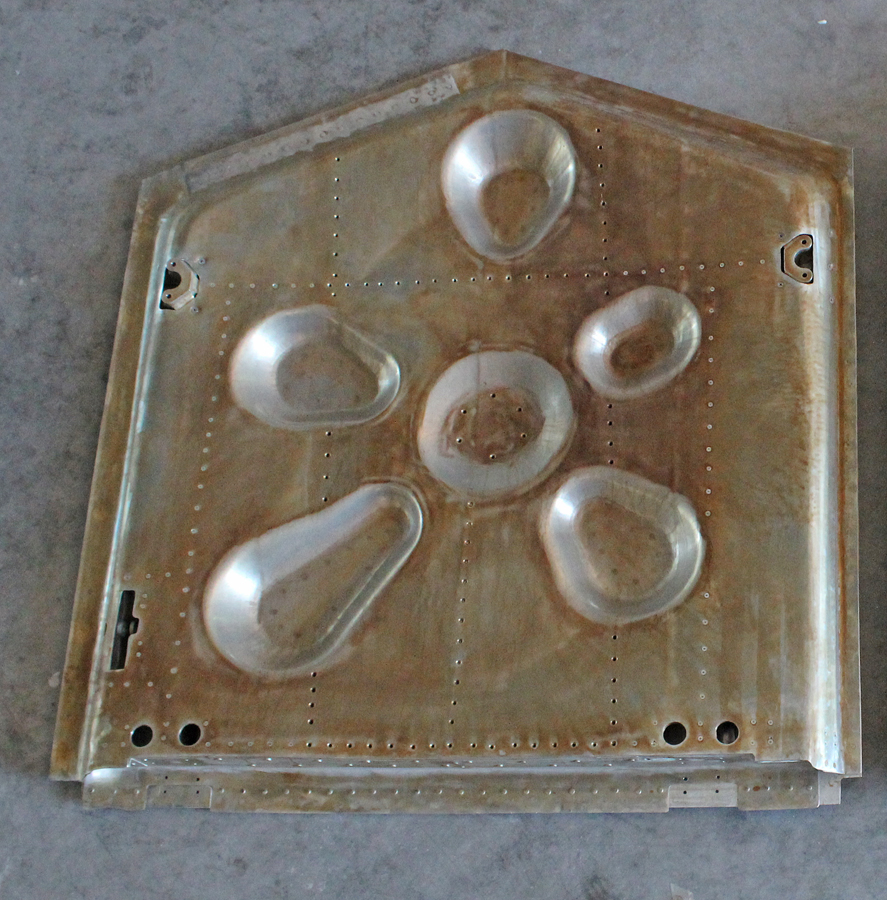
Gear Doors – Two Main & Four Tail

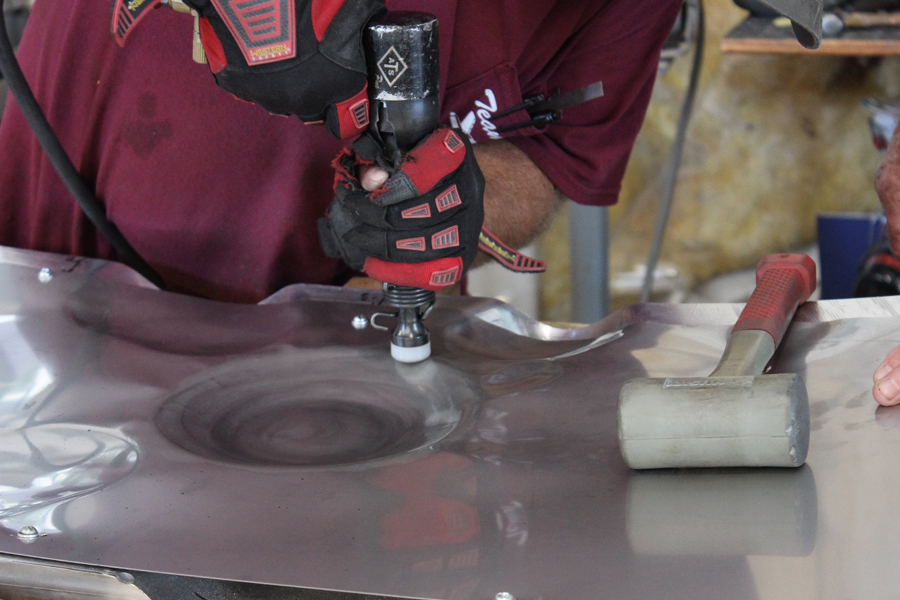
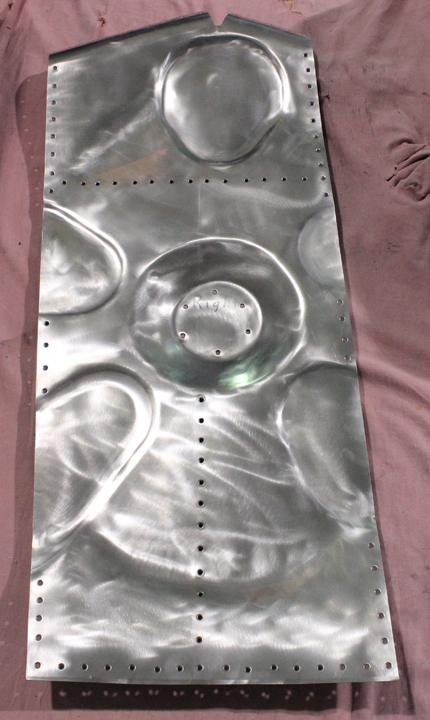
A job that Tom Reilly thought would be very difficult, pressing the two inside waffle skins, turned out to be a very quick and efficient job that came out perfectly within three weeks. Two team members completed all of the interior framework, including the installation of the up-lock latch forgings (two per door) along with the two flat exterior skins.

Left-hand inboard gear door showing uplock latches, pins, hooks and the internal rib structure. (photo via Tom Reilly)

Left-hand inboard gear door without external skin during final fitting. (photo via Tom Reilly)

Left-hand inboard gear door with latching during final fitting. (photo via Tom Reilly)

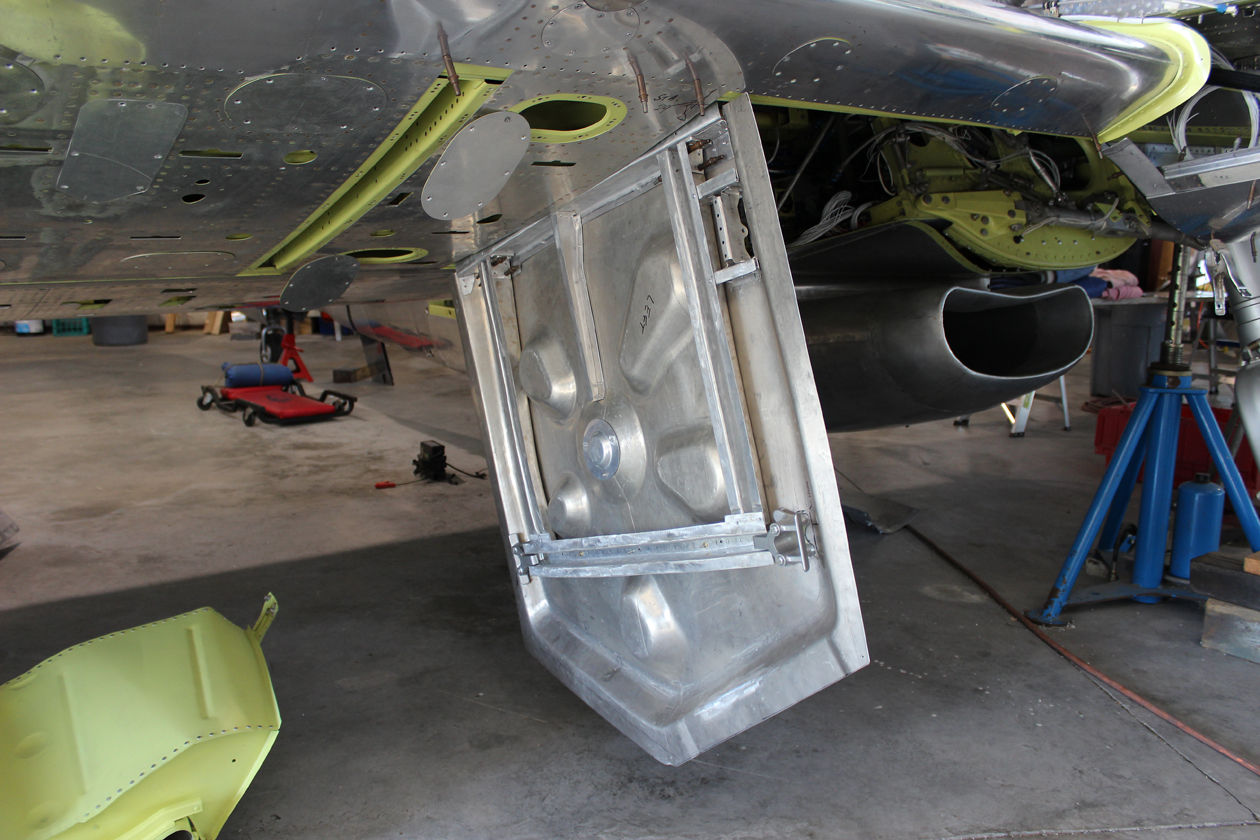
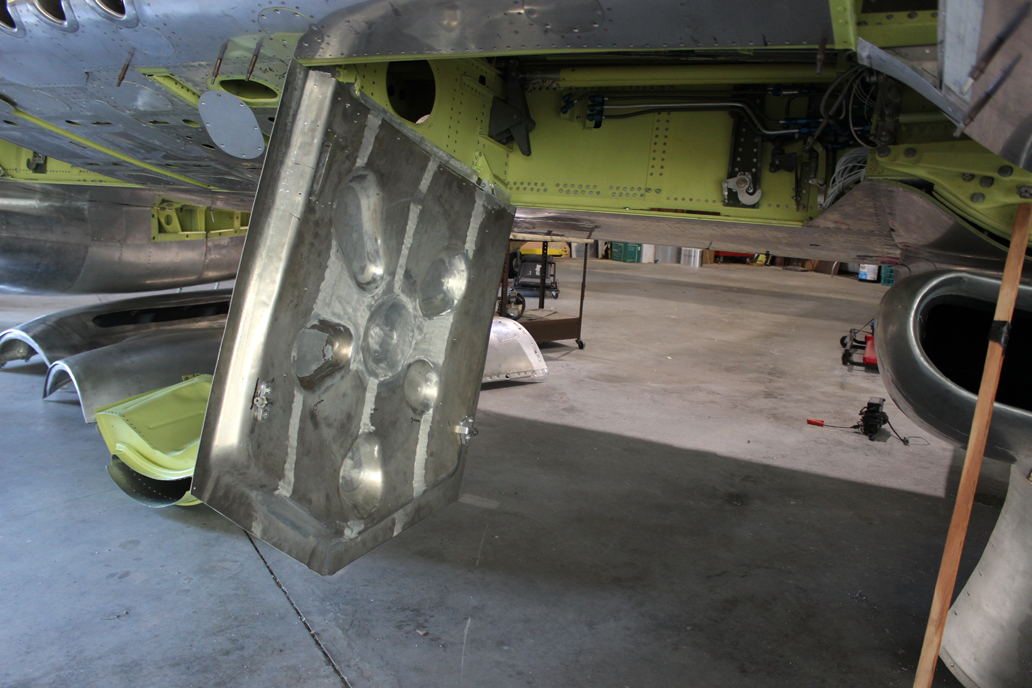
Reilly took the two main gear doors, along with the four tail wheel doors to Kermit Weeks’ facility in Polk City, Florida for spot welding. With these six doors completed, that completes 99.9% of the sheet metal work on the XP-82. The only remaining sheet metal items are the two outboard gear doors and the adjoining lower engine close-out fairings that cannot be completed until the team ascertains the exact curvature and pattern off each outboard door. The project is waiting for these two outboard doors to be delivered.

The main gear doors and interior skins went through an alodine dip (note the yellowish hue) prior to primer-painting. (photo via Tom Reilly)

The exterior of one of the main gear doors with its outer skin firmly riveted in place. (photo via Tom Reilly)

Shaping stainless steel sheet into the liners for the interior of the main gear doors. (photo via Tom Reilly)

Larger strokes are made using the rubber mallet to bash the sheet metal into the die form beneath, whereas finer manipulation is achieved using a rubber-tipped set on the rivet gun as shown in this closeup. (photo via Tom Reilly)
Larger strokes are made using the rubber mallet to ‘bash’ the sheet metal into the die form beneath, whereas finer manipulation is achieved using a rubber-tipped set on the rivet gun as shown in this closeup. (photo via Tom Reilly)

The finished article, complete with rivet holes for mounting onto one of the main gear doors. (photo via Tom Reilly)

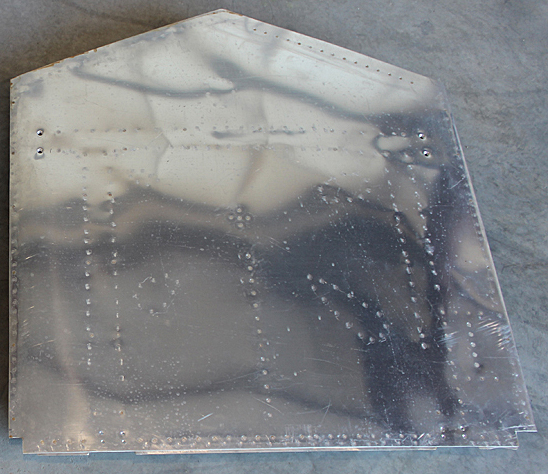
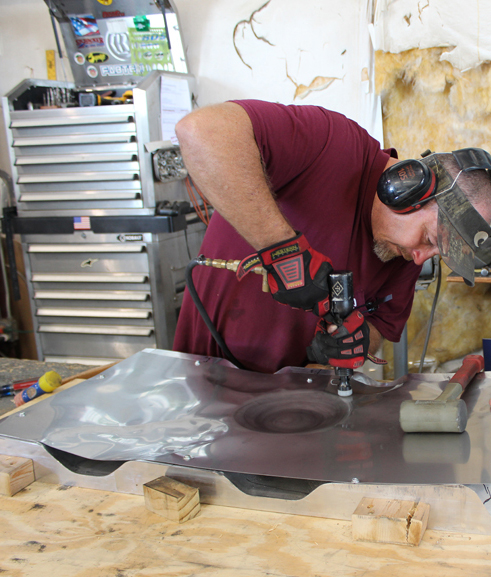
Pat Harker supplied the project with four tail gear door interior pressings. Within a few days these two team members had them fitted to the eight installed hinges with the newly formed outside skins. These outside skins are now spot welded to the inside pressings.

The tail wheel doors. (photo via Tom Reilly)

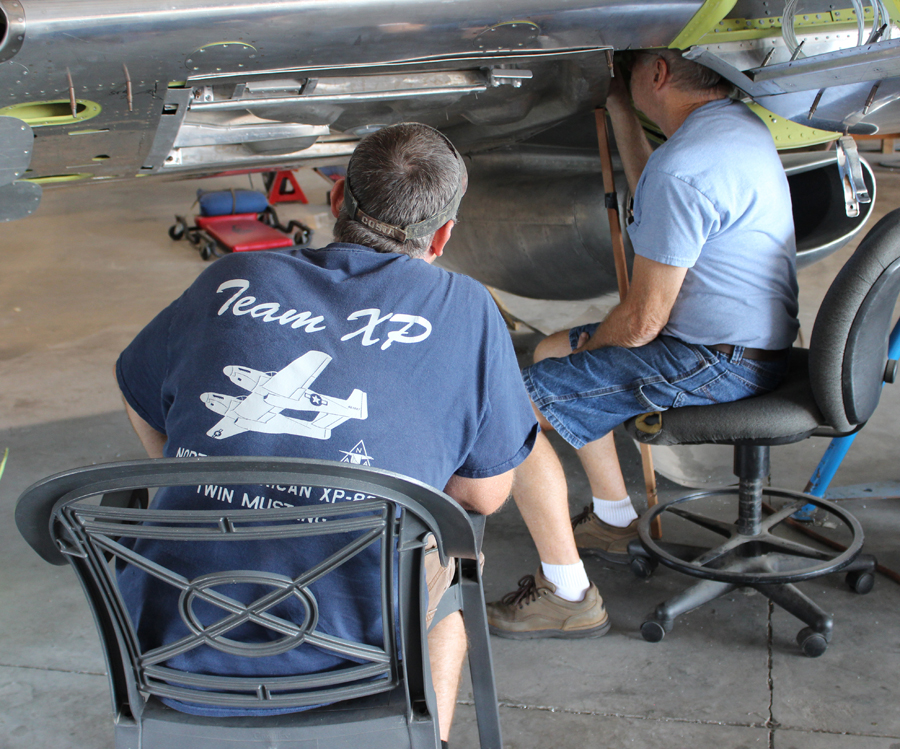
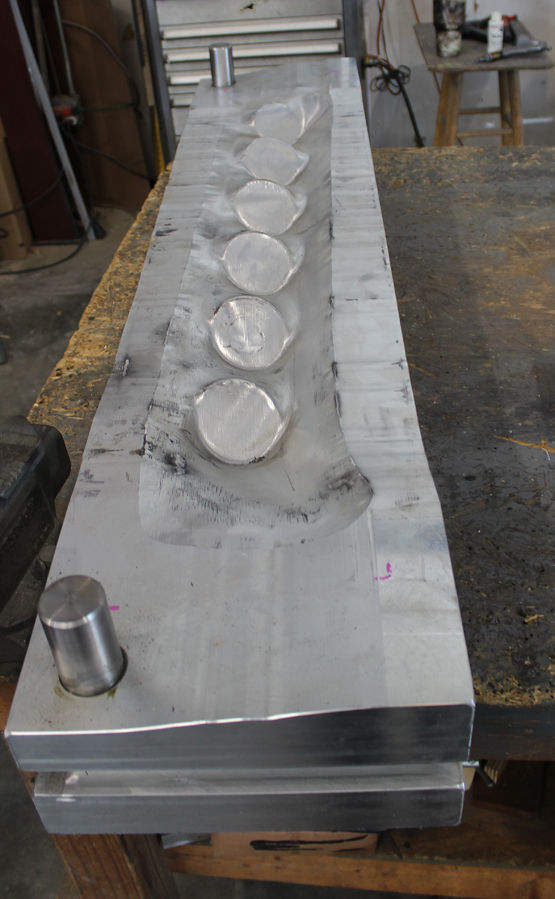
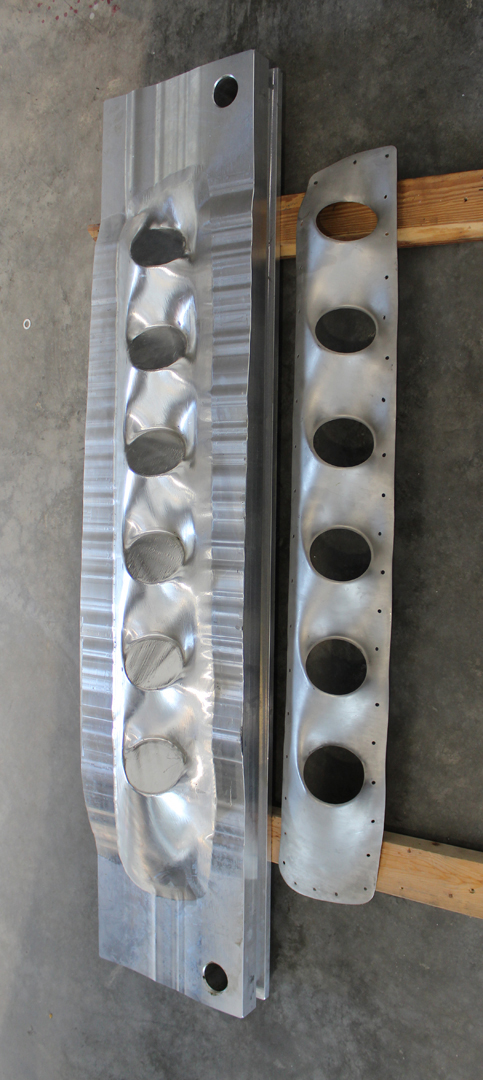
Engine Exhaust Fairings

A newly-machined press die (male) for the exhaust fairings for the right-hand engine. (photo via Tom Reilly)

The female die for the engine exhaust fairing alongside the finished article. Tom and his team will use a 200 ton hydraulic press to form these .050" stainless steel fairings between the male and female dies. (photo via Tom Reilly)
The female die for the engine exhaust fairing alongside the finished article. Tom and his team will use a 200 ton hydraulic press to form these .050″ stainless steel fairings between the male and female dies. (photo via Tom Reilly)

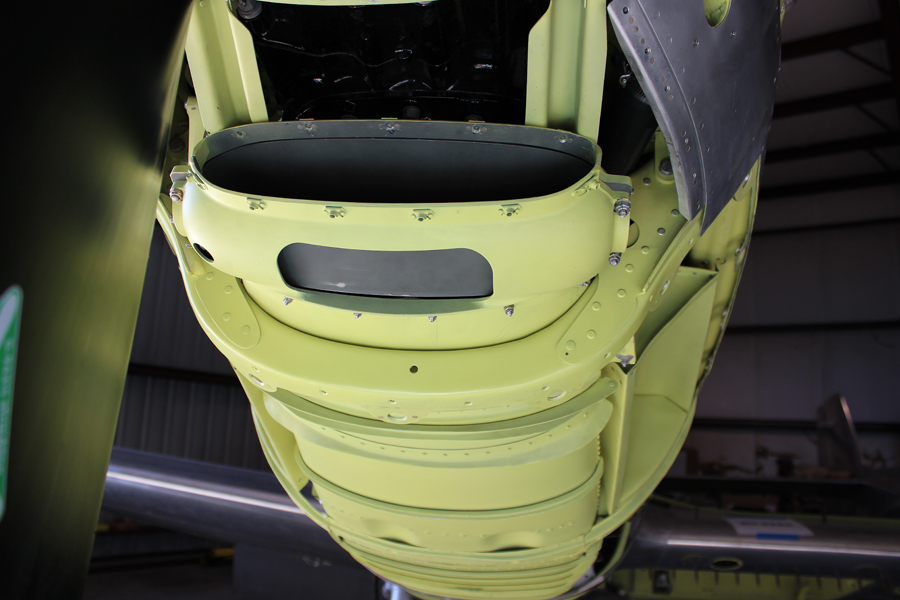
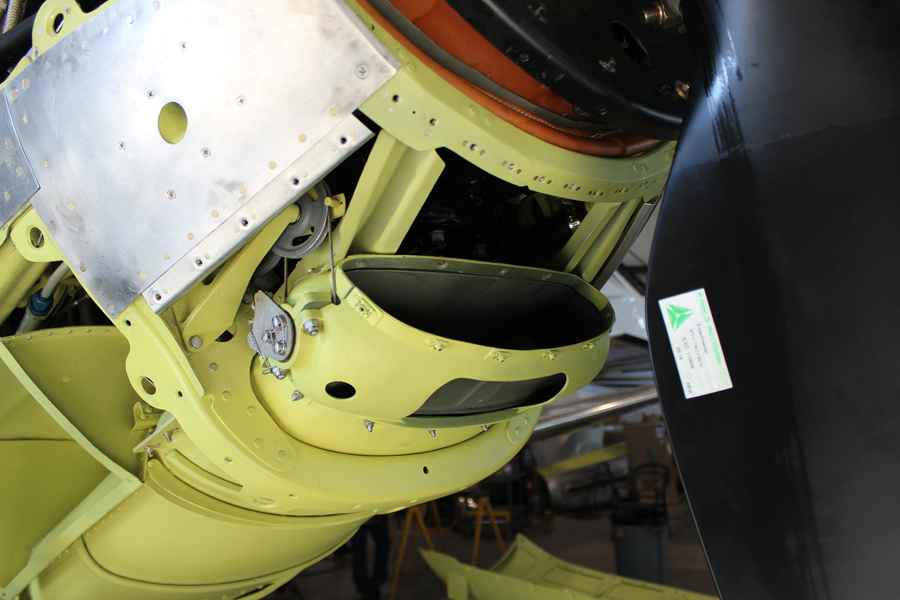
Carburetor Air Induction System

The final installation of the rotating barrels, located underneath each spinner that control the air induction temperatures, and all of the induction trunks back to the carburetor inlets are now completed. The only thing to remaining to be done on these induction systems are the rod and lever mechanism adjustments that open the hot air doors for carburetor heat.
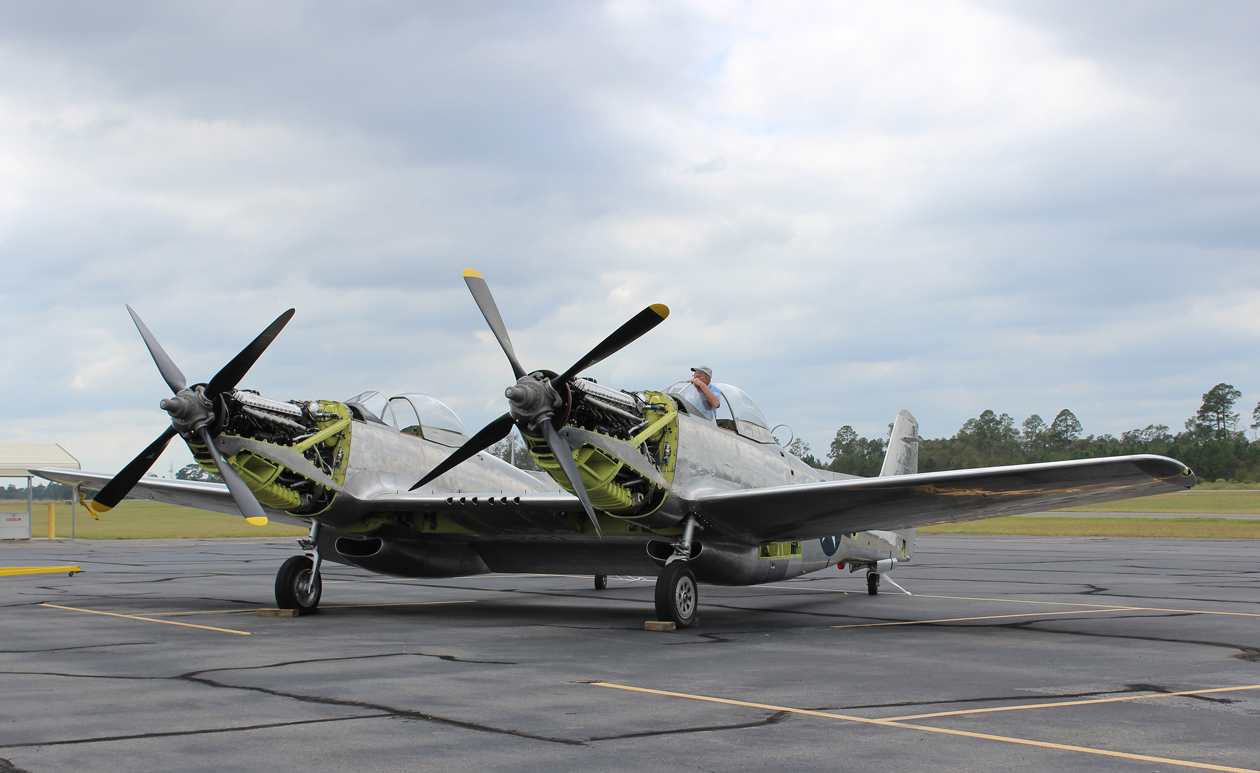
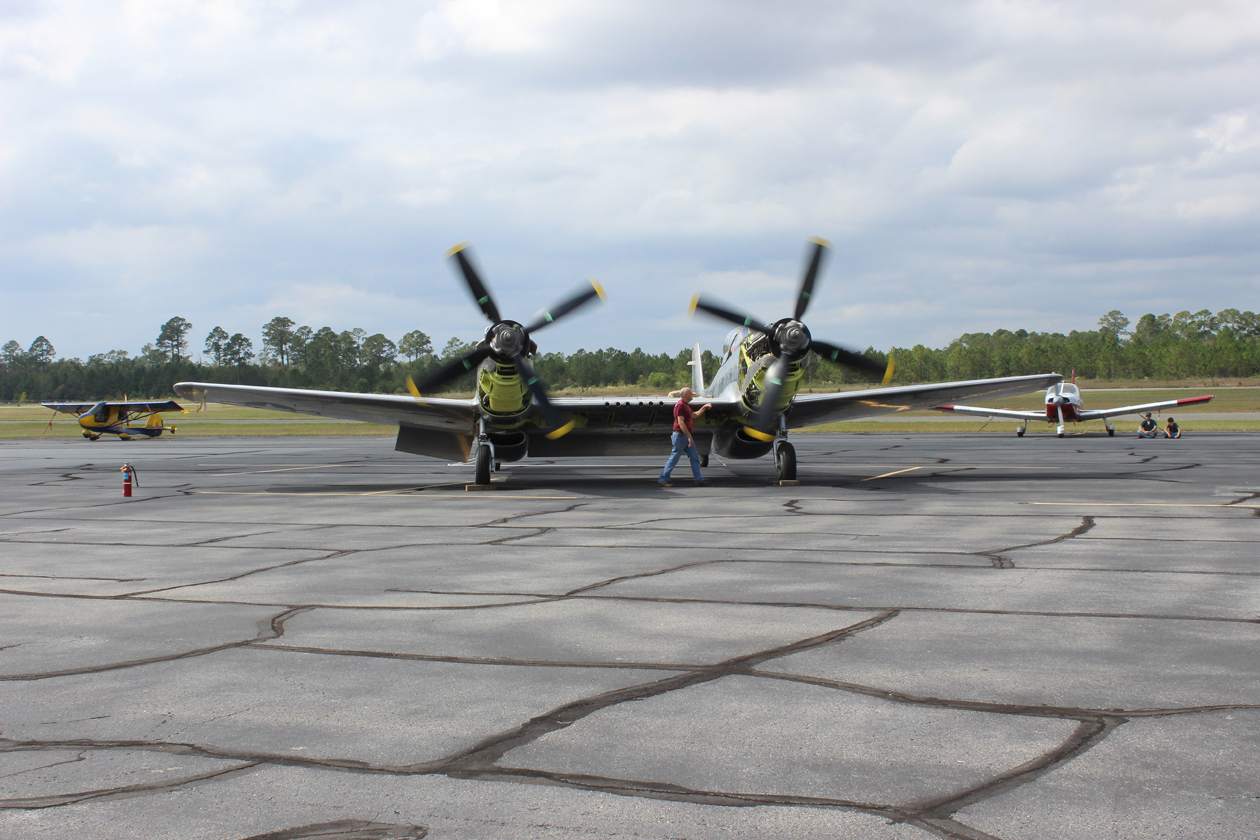
The carburetor air intake barrel; newly completed, and installed on the right engine. (photo via Tom Reilly)

A view of the newly-installed carburetor air intake barrel on the left engine giving an idea of how it operates to regulate intake air temperature. (photo via Tom Reilly)

Engine Run

In a major restoration landmark, Tom Reilly and his team pulled the XP-82 out onto the ramp, tied down both tails and chocked both main wheels and started both engines simultaneously for the first time. Reilly initially ran them at idle for about two minutes, until the oil and coolant temperatures rose, and then he brought both engines up to a little over 1000 rpm (not fast enough to check generator or propeller functions). All of the fuel, oil, tachometer and associated temperature gauges worked as expected.

Both engines running October 14th, 2017. (photo via Tom Reilly)

And that is all for this month’s report.


Many thanks again to Tom Reilly for this update. You can learn more about the project on their blog HERE. Although we are not exactly sure when the next formal update will come, please be sure to check back with WarbirdsNews in a couple of months for the next installment in the story following the XP-82′s road to recovery!

Array

Be the first to comment

Graphic Design, Branding and Aviation Art

Leave a Reply

Your email address will not be published.


*