


WarbirdsNews has received the latest XP-82 Twin Mustang restoration update from Tom Reilly at his workshop in Douglas, Georgia, and we thought you would all be pleased to see the latest progress!
The end of the ten-year XP-82 restoration project is in sight, and as Tom Reilly noted… the light at the end of the tunnel is not an oncoming train! The team is down to a rather short punch list with another ten weeks to go. A few of the outstanding items could have precluded the Twin Mustang prototype from making Oshkosh this year, but thankfully these potential problems have been solved.
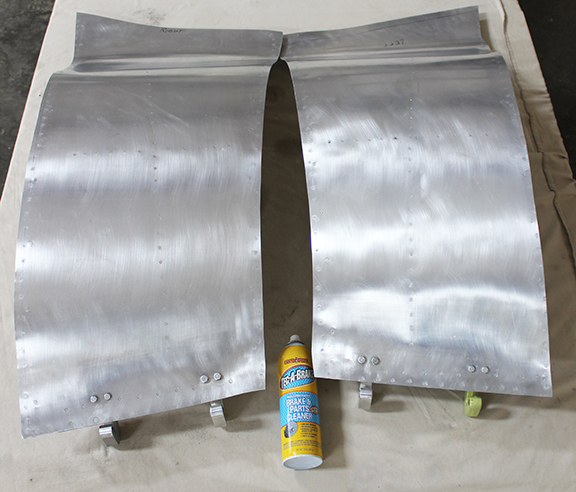
Outdoor Gear Doors:
Both inboard pressings were delivered to the project about three weeks ago. Tom Reilly thought the fitting of these doors was going to be extremely difficult and time consuming, but Paul had them installed perfectly within a week. The internal framework is also now fitted and both components have been completed with the addition of the spot-welded, outside skins.
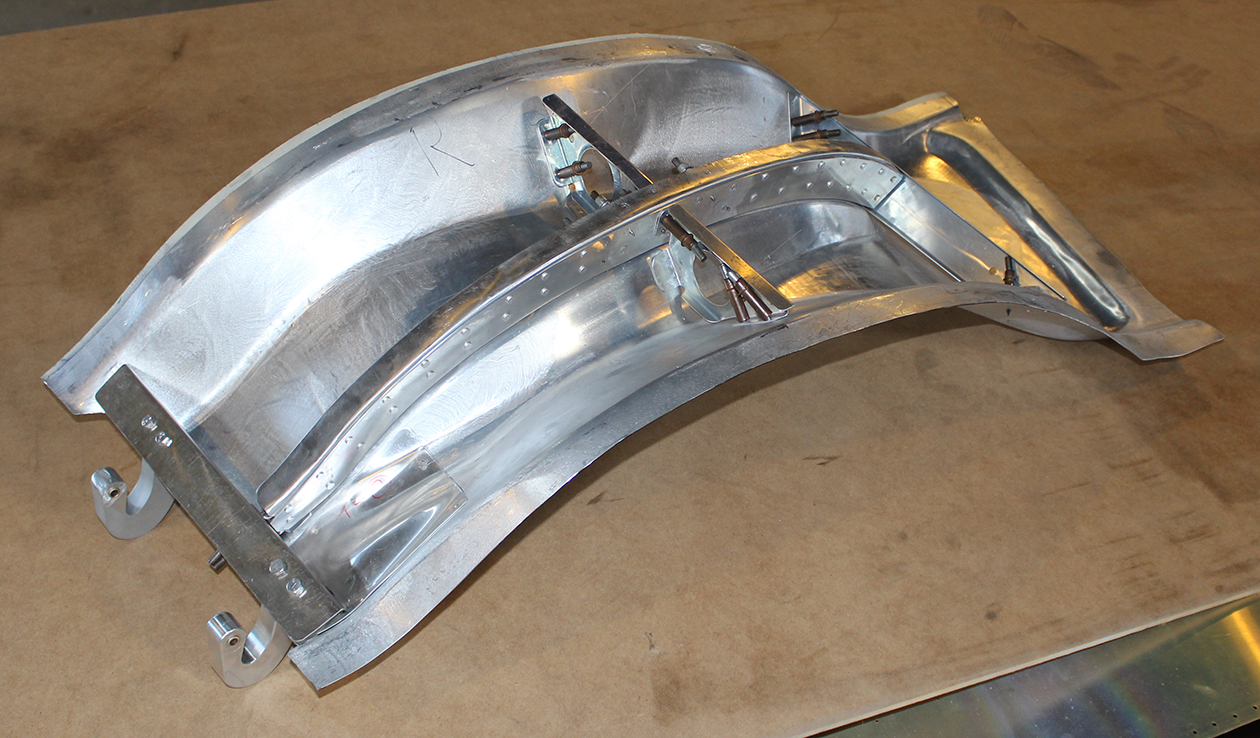
Tailwheel Doors:
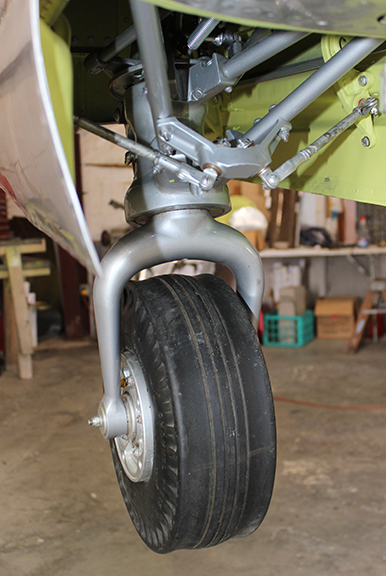
The two tailwheel door retract brackets have been completed and attached. The four doors are mechanically retracted by rods attached to the tailwheel arm structure(s). The two tailwheel assemblies are not retracted by hydraulics but rather by a 3/16″ stainless steel cable running the full length of each fuselage up to a set of pulleys attached to each main landing gear retract arm. When each main gear retracts, each tailwheel is drawn up into its up-locked position along with the doors. On extension of the main gear, both tailwheel assemblies unlock, gravity-extend and cable-latch the down lock. This is a unique North American Aviation, factory-installed retract system.
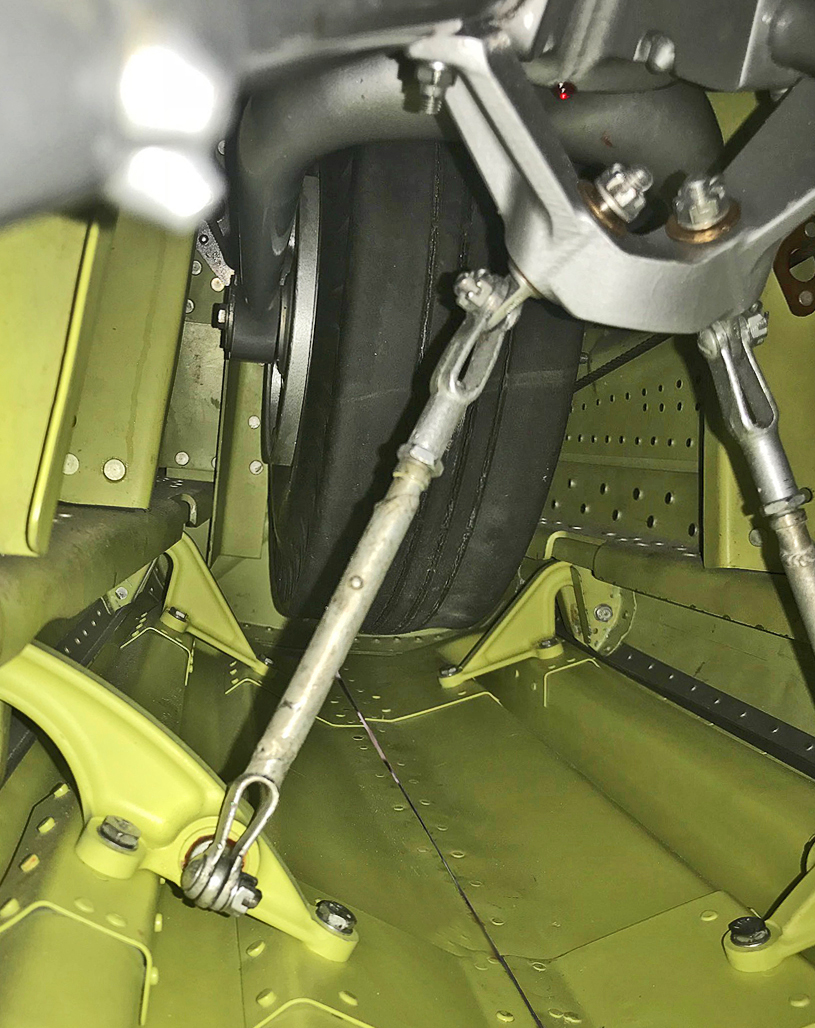
Landing Gear Retractions:
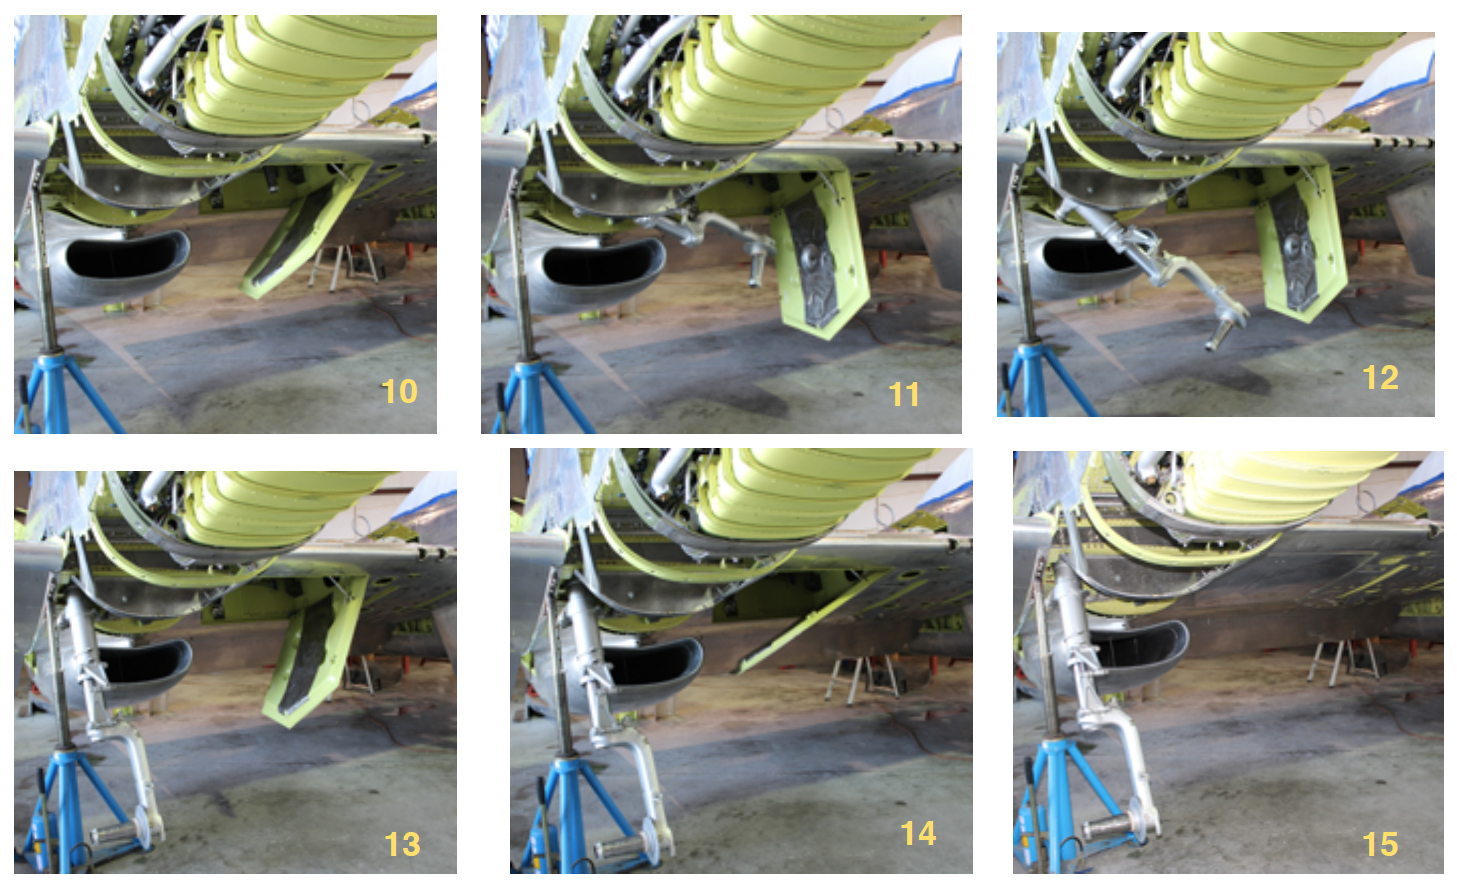
The restoration team has completed the landing gear retraction tests and timing valve adjustments that sequence the inboard gear doors opening and closing. Following both the gear-up and gear-down operations, the main inboard undercarriage doors are at rest in the closed position. Timing valves sequence the proper opening and closing of these doors for the gear to pass. It is a straight-forward NAA design that works extremely well. The following photos show how the process works, starting with retraction, and then extension. The gear starts to retract in image 1. It locks in the up position in image 3, following which the main gear door closes in images 4 – 7. Image 8 shows the beginning of the reverse process. The door starts opening, and has completed the process by image 11, when the main gear starts extending. Once the main gear is down and locked in image 13, the door begins folding back up into the closed position.

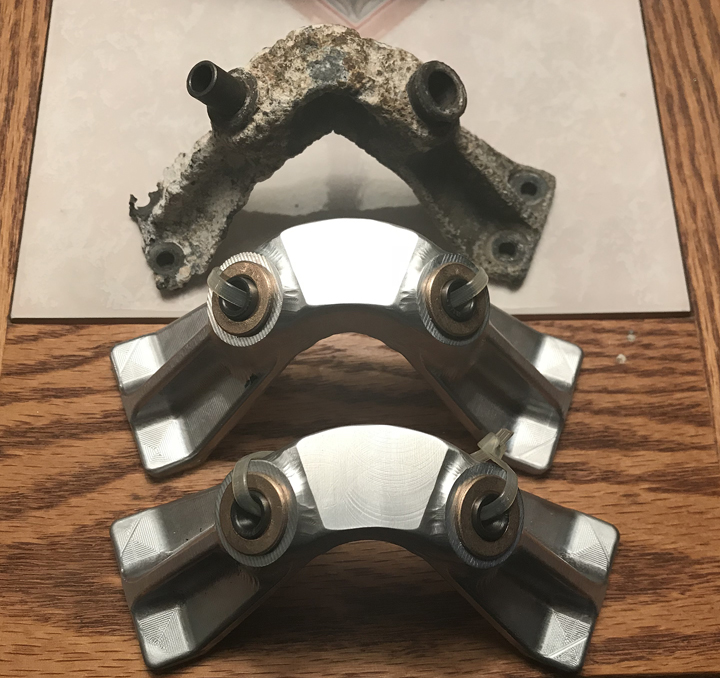
Brake Assemblies:
The last two major items that the team has been awaiting to complete the XP-82 are the brake calipers. Interestingly, this style of brake assembly was unique to the XP/F-82 Twin Mustang series, thus they were unavailable on the surplus market.
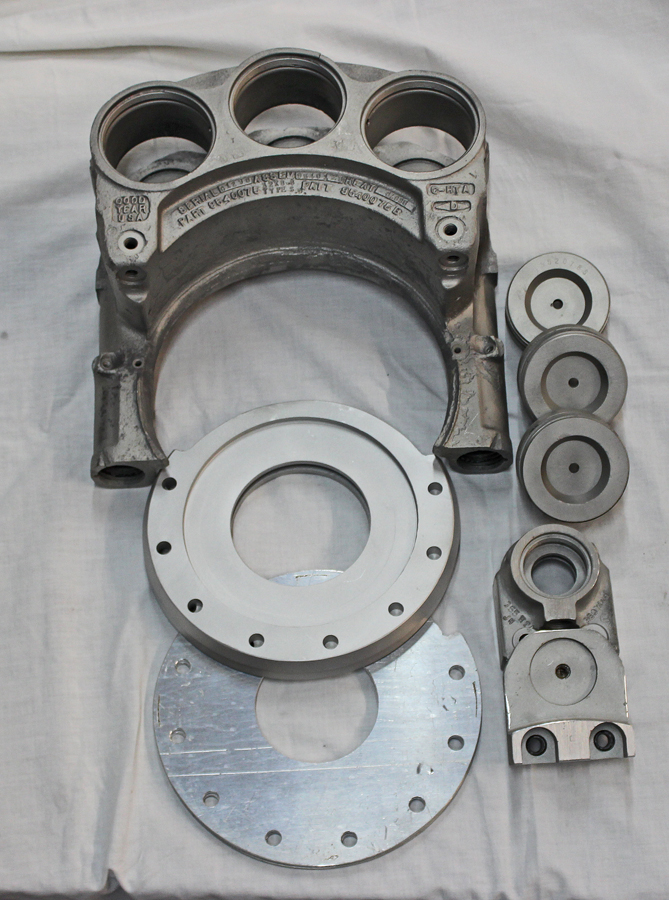
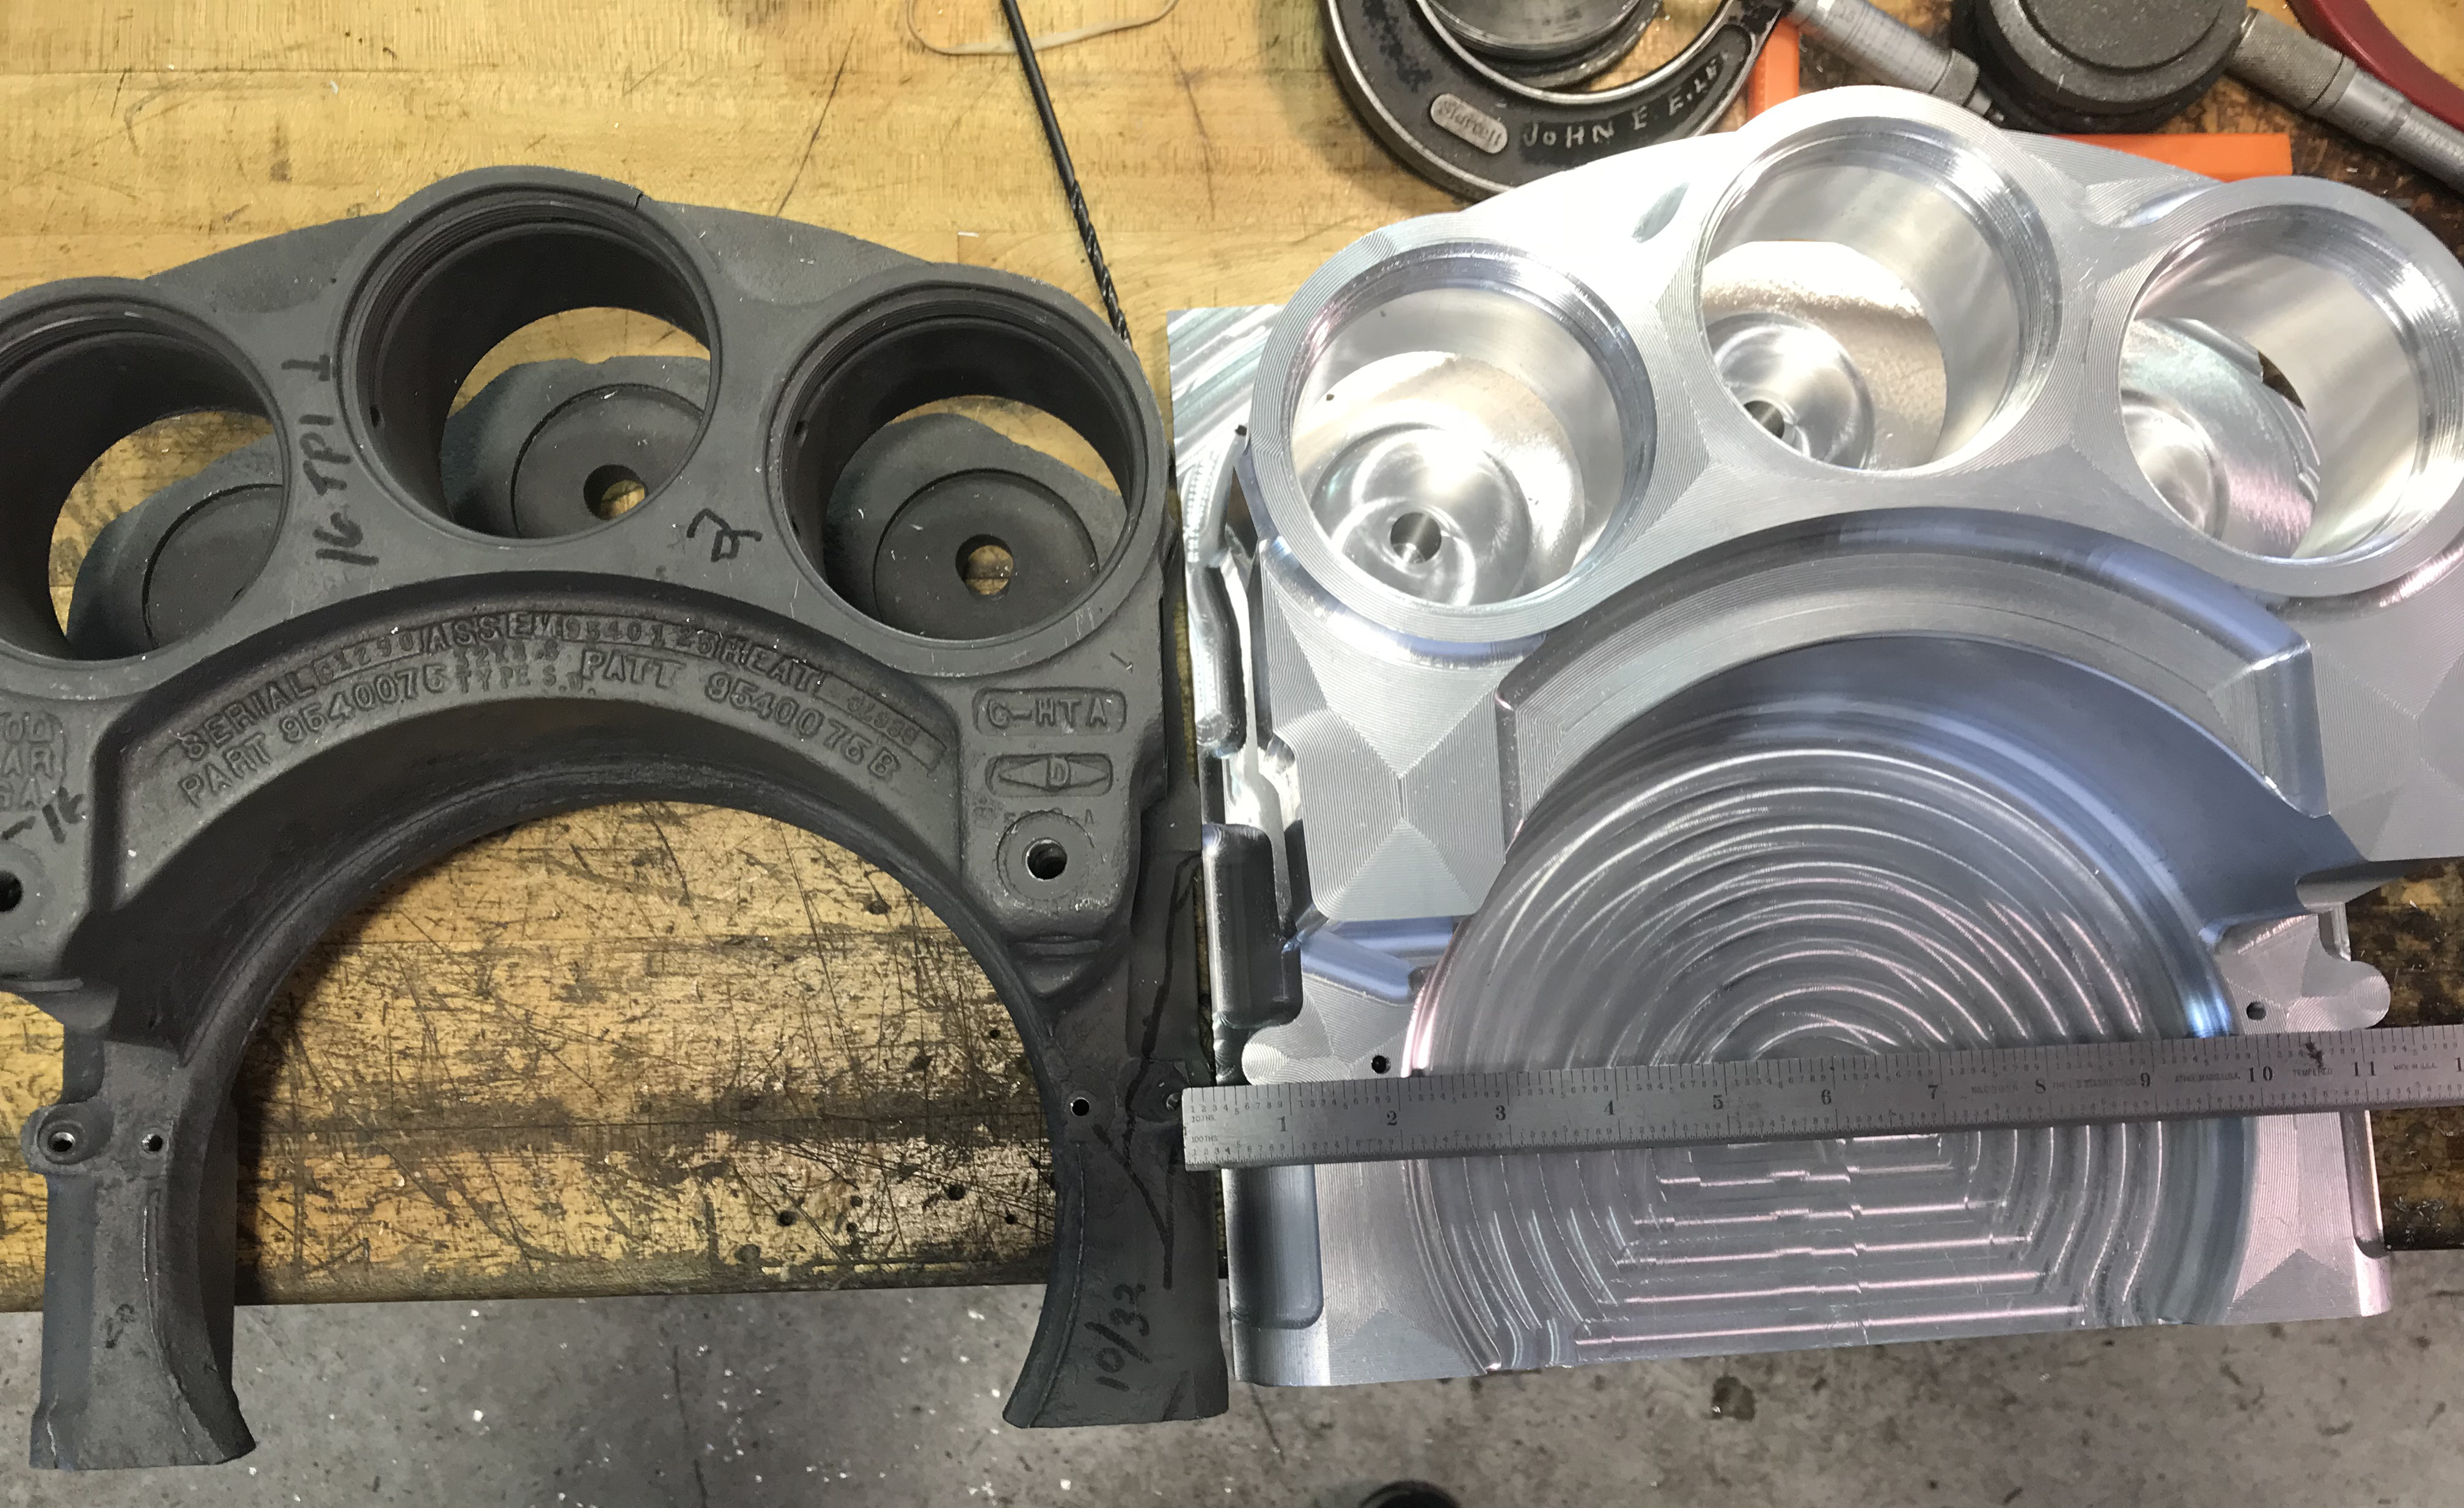
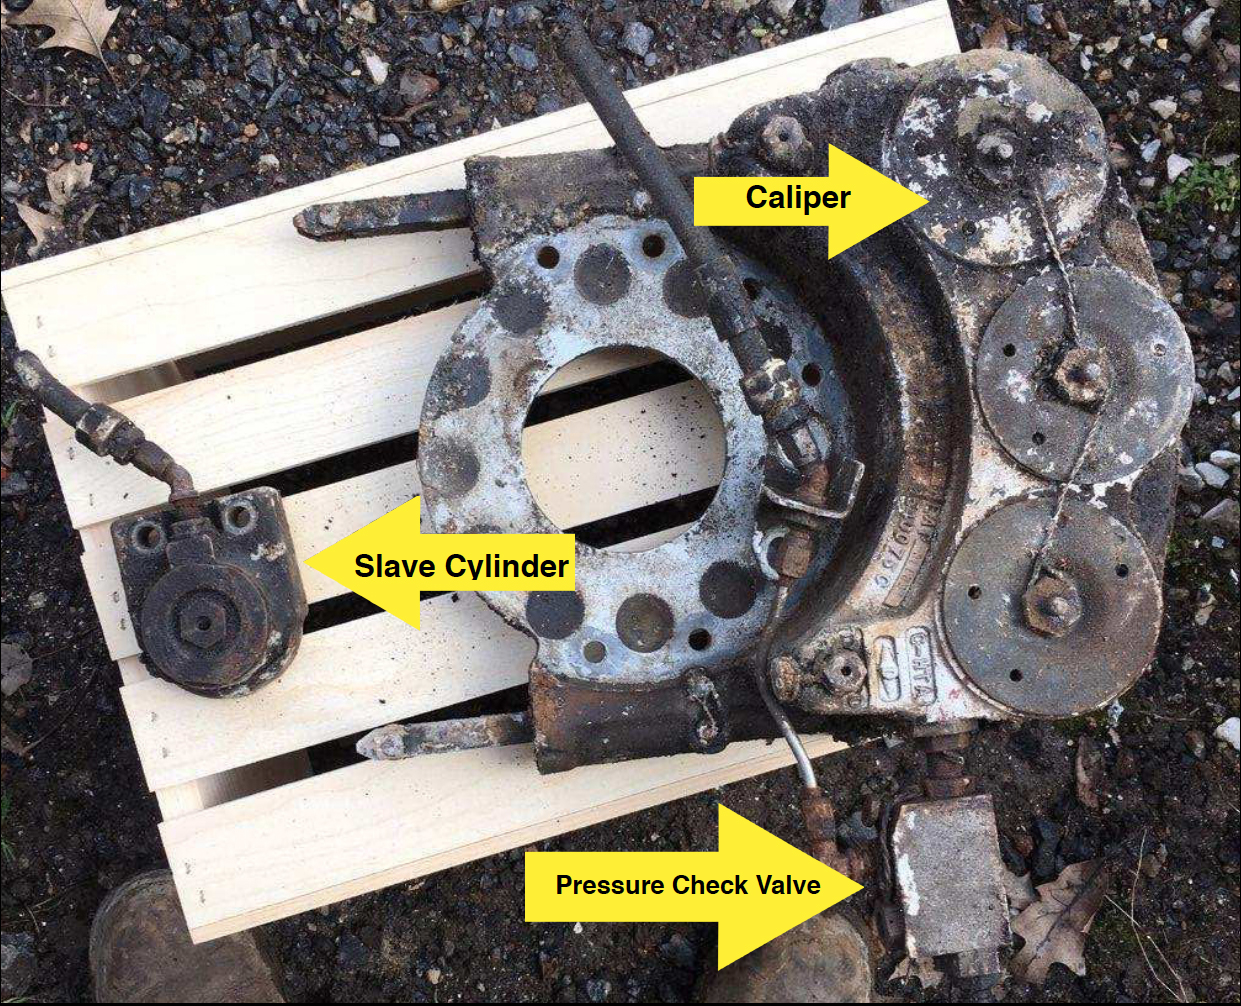
The most serious of these missing brake items were the two small pressure check valve boxes. Pictures are attached. The team’s main machinist, John, expects to have both calipers completed within the next week. John was able to make a 3D print using the non-airworthy, magnesium caliper example that the team recovered from the Alaskan wreck site as a reference. He is well into completing the machining of both new aluminum calipers. BUT, the team had no samples of the small pressure check valve boxes to copy. The big problem was that the entire brake assembly was manufactured by Goodyear and the XP-82 parts books did not give any breakdown or part numbers of any of the associated Goodyear brake parts. Thus the restoration team had nothing they could take apart and copy to replace the two missing pressure check valves.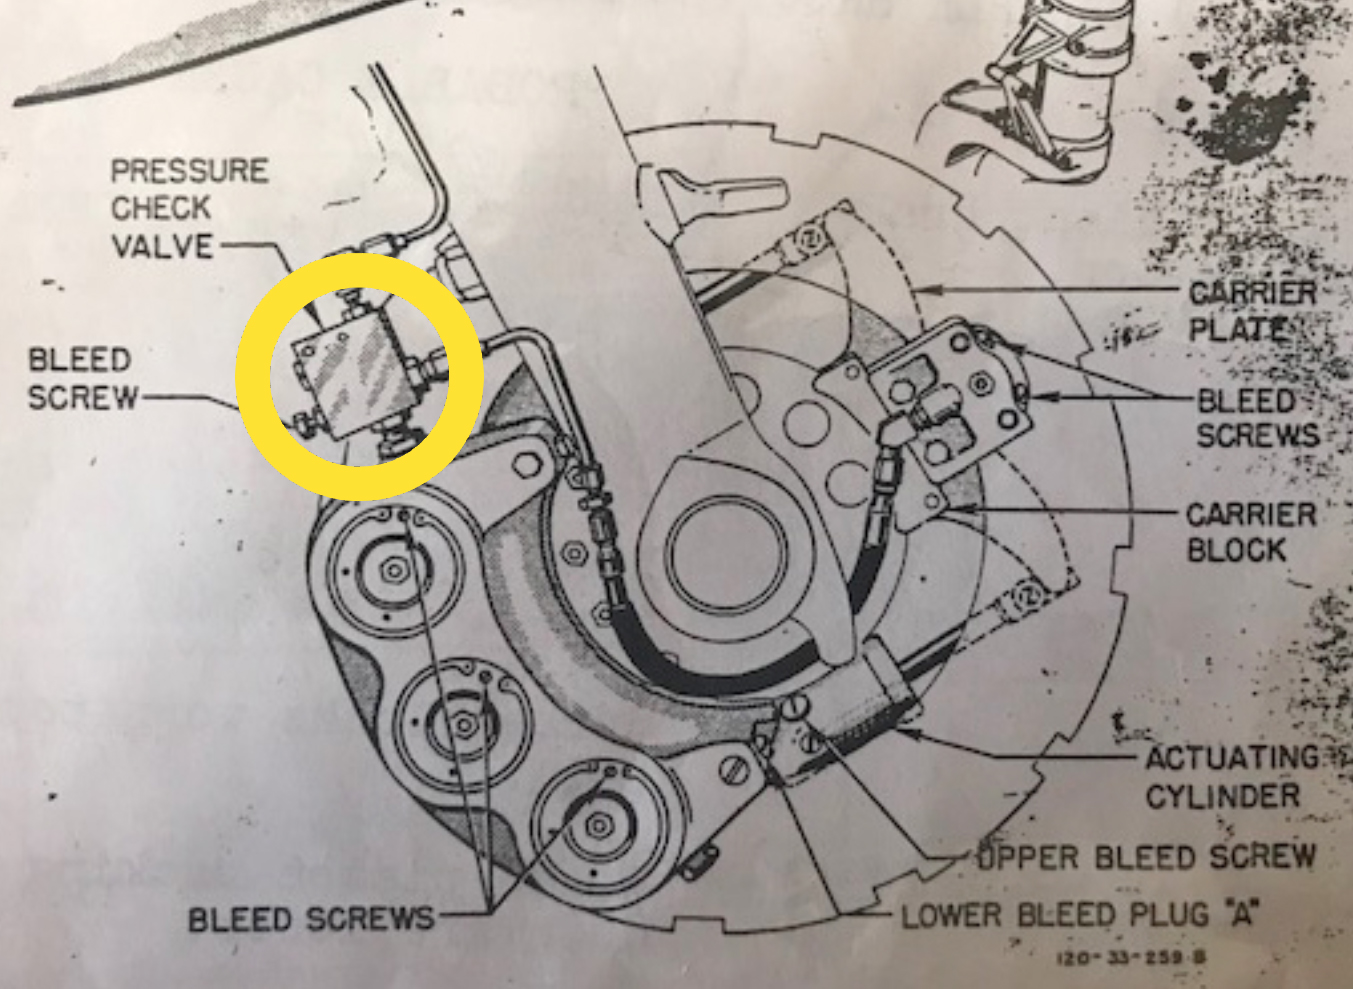
However, in a stroke of great fortune, John Soplata, the grandson of Walter and Margaret Soplata, discovered a complete XP-82 brake assembly WITH one pressure check valve. John Soplata had already come to the rescue once previously, when he discovered the elusive second main wheel in the cellar of the family home.
The entire brake and check valve assembly arrived at the XP-82’s present home in Douglas, Georgia via FED EX. Now that the team has both brake assemblies, they can salvage all of the original pistons, springs, depth indicators and slave cylinders for the project. The two original calipers are magnesium castings though, and due to corrosion issues, they could not be made airworthy. So, along with the two new calipers currently under manufacture, all that remains to complete the brake package is the duplication of the one small check valve box. This will be completed within two weeks. Not having these pressure check valves would have ground the project to a halt, and thus a time-consuming and costly bump in the road has been avoided.
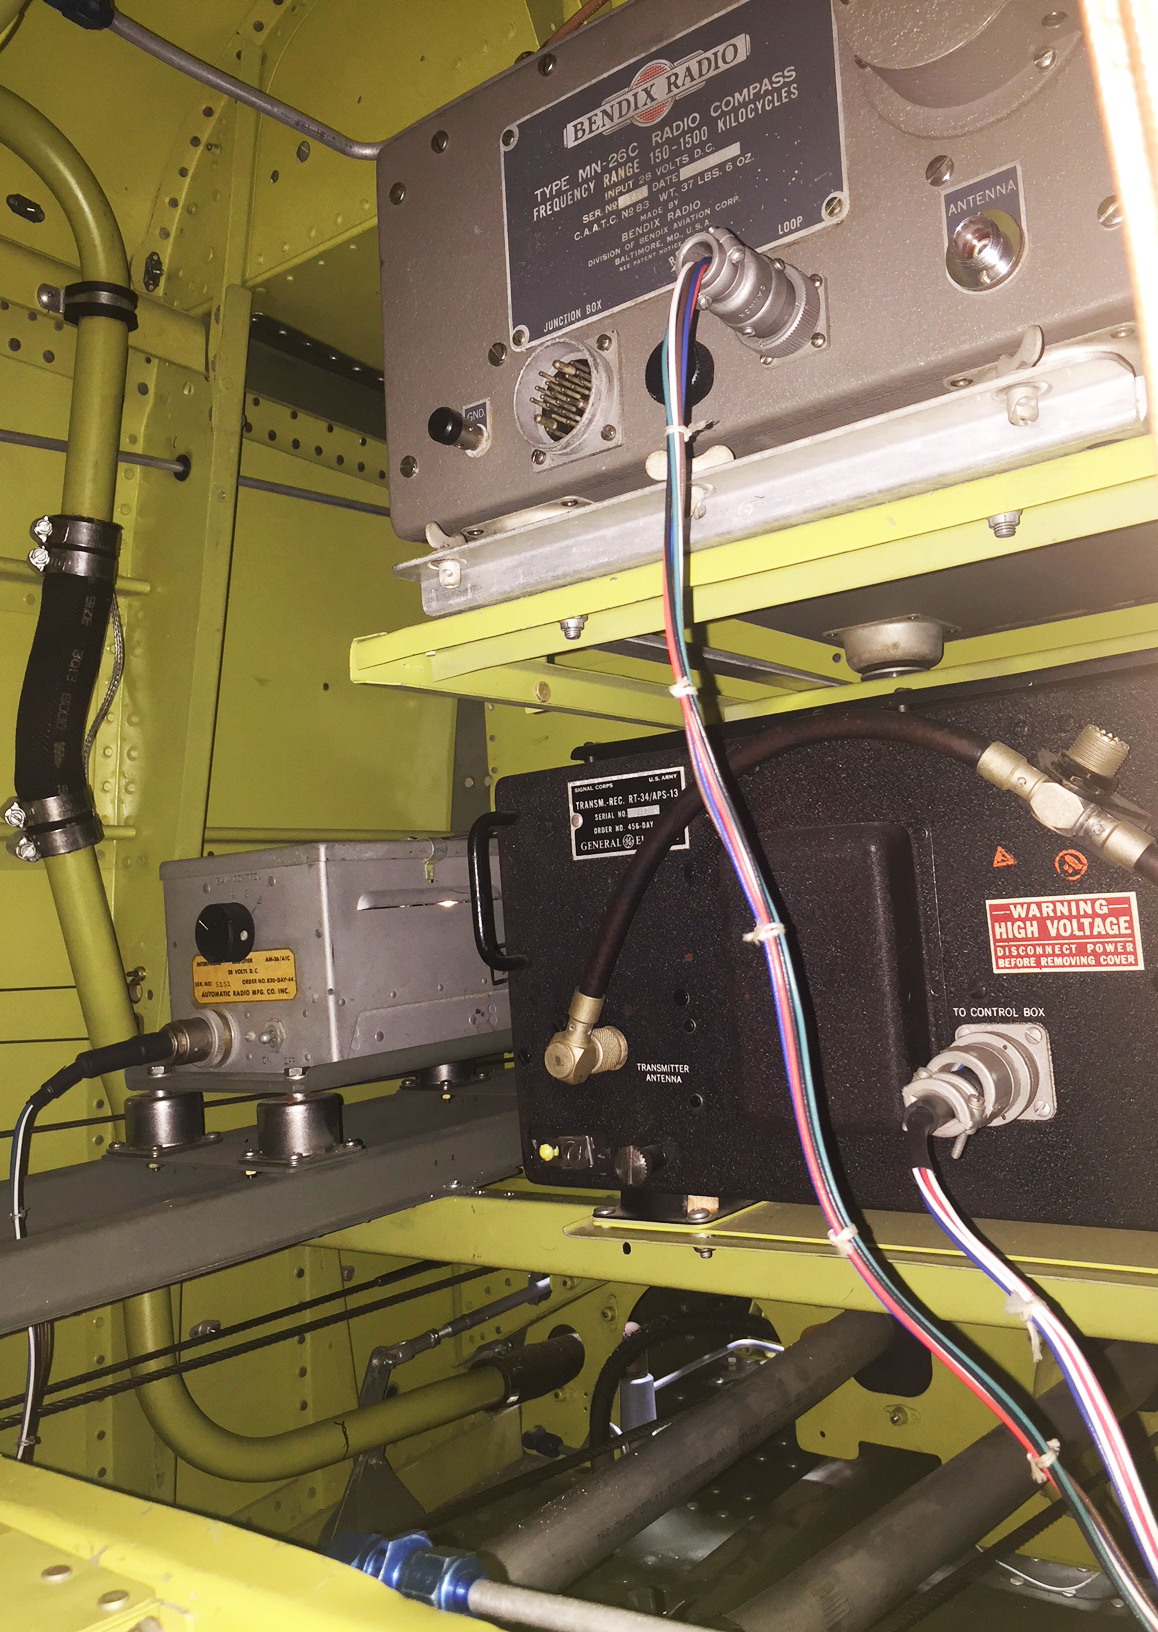
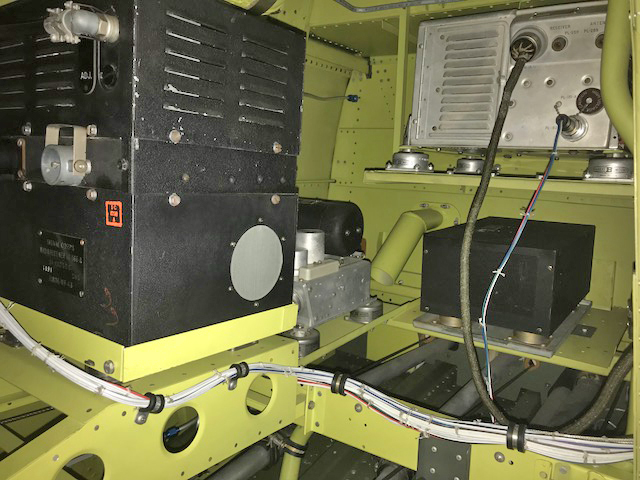
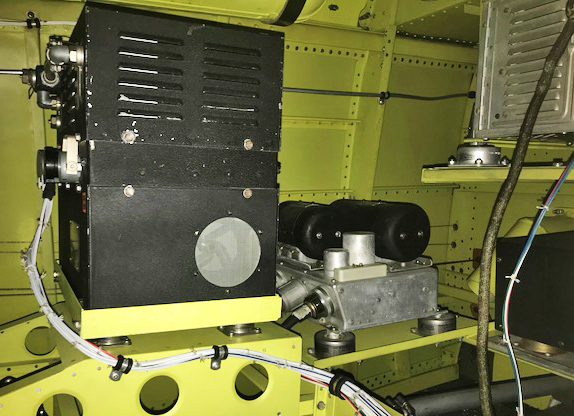
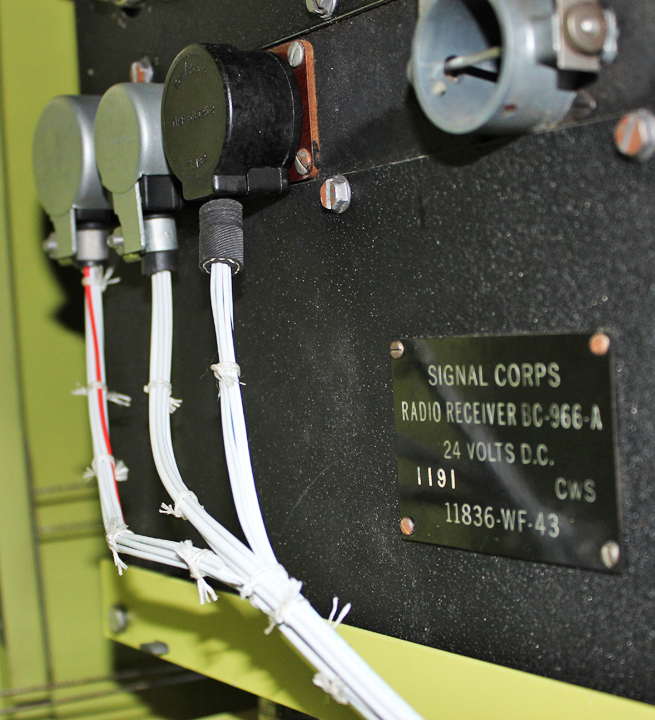
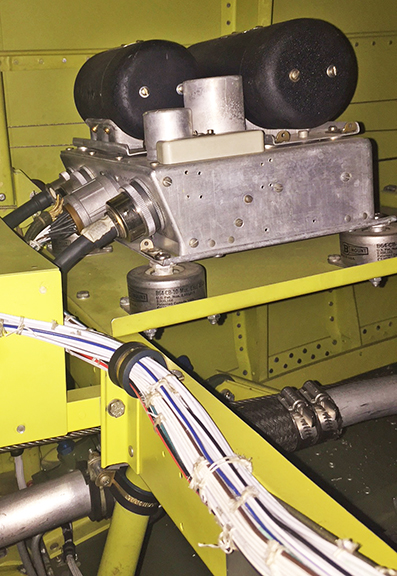
Original Radios:
The restoration team was able to find the seven radios of the correct types that were originally installed in the XP-82, along with all of their associated Cannon plugs. For authenticity, Tom Reilly has duplicated the exact colors for the wires that were soldered back into the original-style plugs. To complete the original installation suite, the team still has one more Cannon plug remaining to solder, along with the antenna wires that plug into the radios and tie ups.
Ailerons:
All four ailerons are now permanently attached. Randall has set the balances, movement ranges, cable tensions and stops to match each cockpit stick.
Rudders and Elevator:
Both rudders and the elevator are now permanently installed. Movement ranges, balances, cable tensions and control movements are now set and synchronized between each cockpit’s stick and pedals. This was quite a time consuming job getting all four pedals matched to each other and to both rudders, but now they are completely done. All safety wiring for the turnbuckles is now completed.
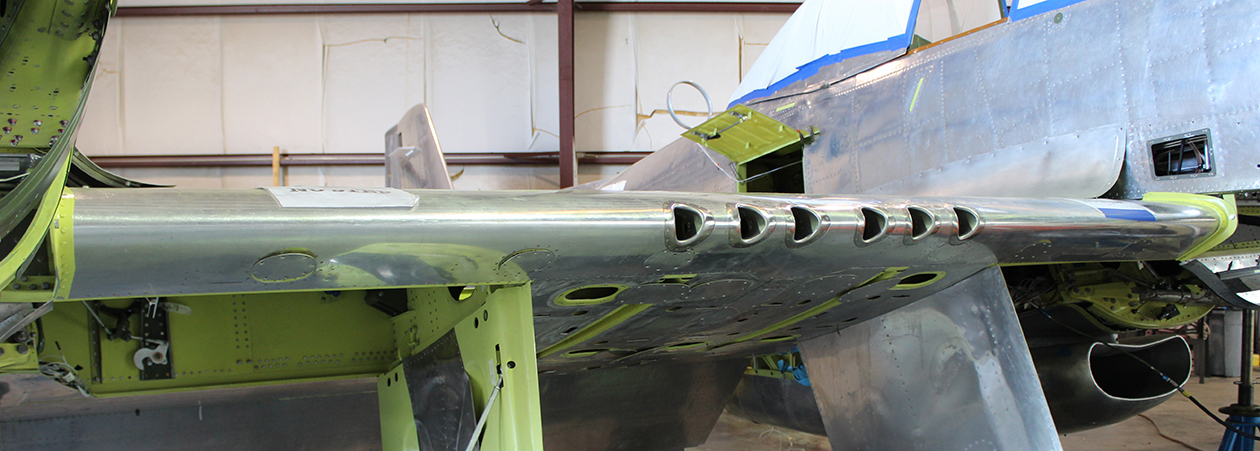
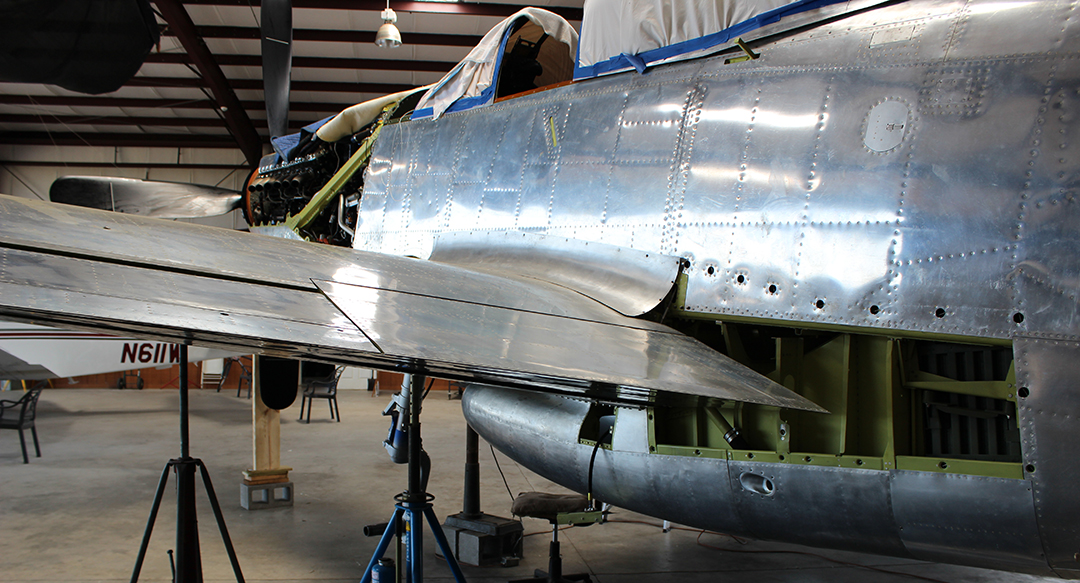
Leading Edge with Gun Ports:
The entire leading edge is now totally attached. This job took Paul and Randall a complete week to finish due to the final riveting and the hundreds of screws and nut plates throughout the forward spar which had to be fastened.
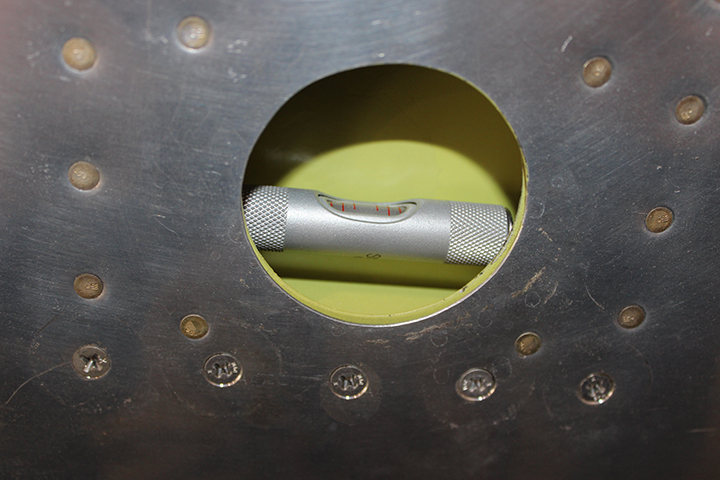
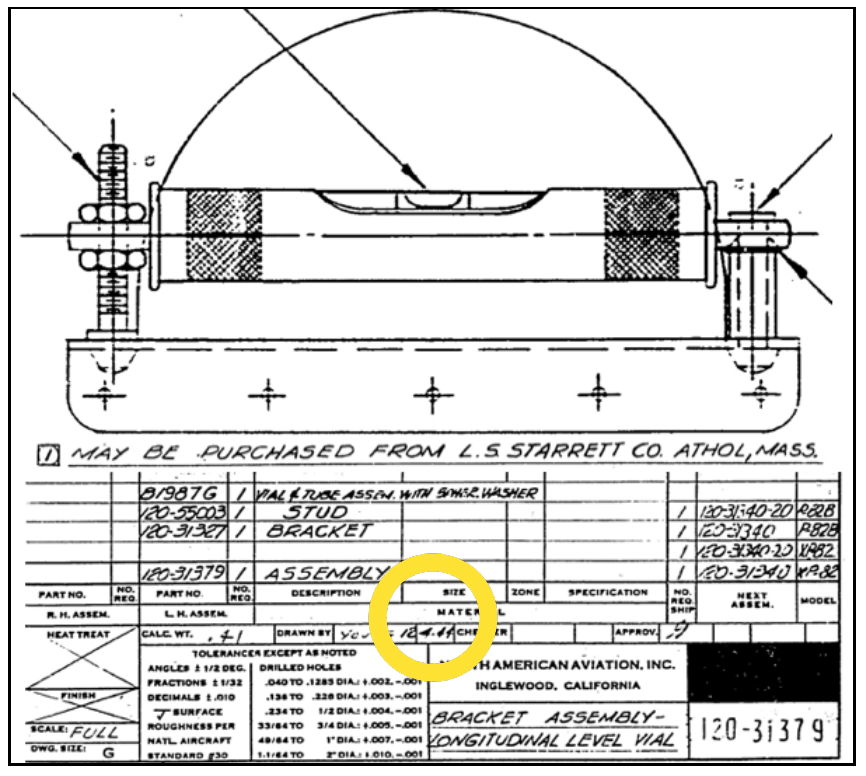
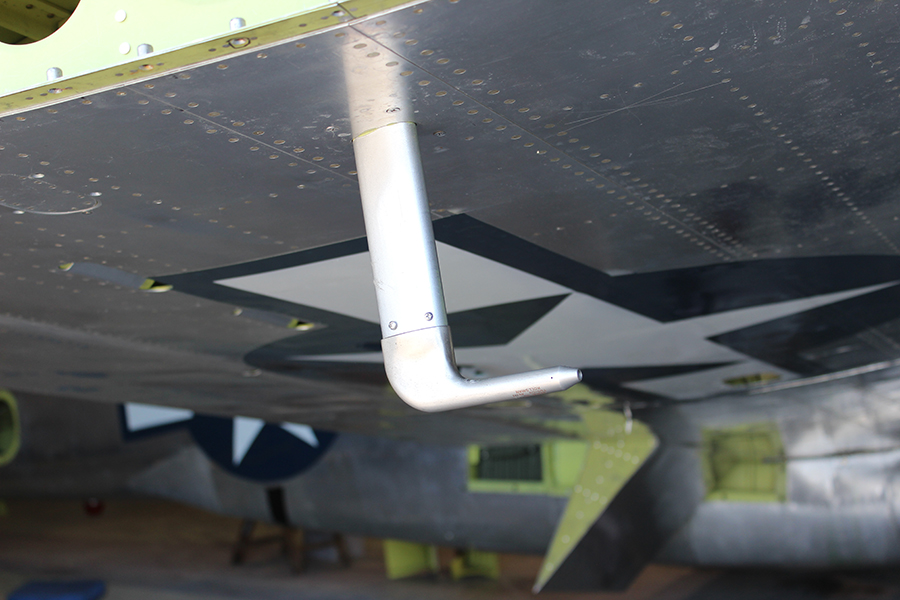
Starrett Level:
Right forward of the left-hand tail wheel there is a 3” round hole in the left side of the fuselage that houses a mounted Starrett level that is visible to set the pitch (tail up/tail down) of the two fuselages when doing a weight and balance measurement. The 1944-dated North American Aviation XP-82 plans show a detailed picture of the level with part its number and the mounting structure. Tom Reilly instructed Weezie to contact Starrett to see if they had one of these levels in their museum that the team could acquire for installation in the XP-82 to make the restoration as original as possible. Within a few hours, she found an identical, brand new example in stock at Grainger in Orlando. What were the chances of finding a Starrett level absolutely identical to the part identified in the 74-year old parts book drawing!?
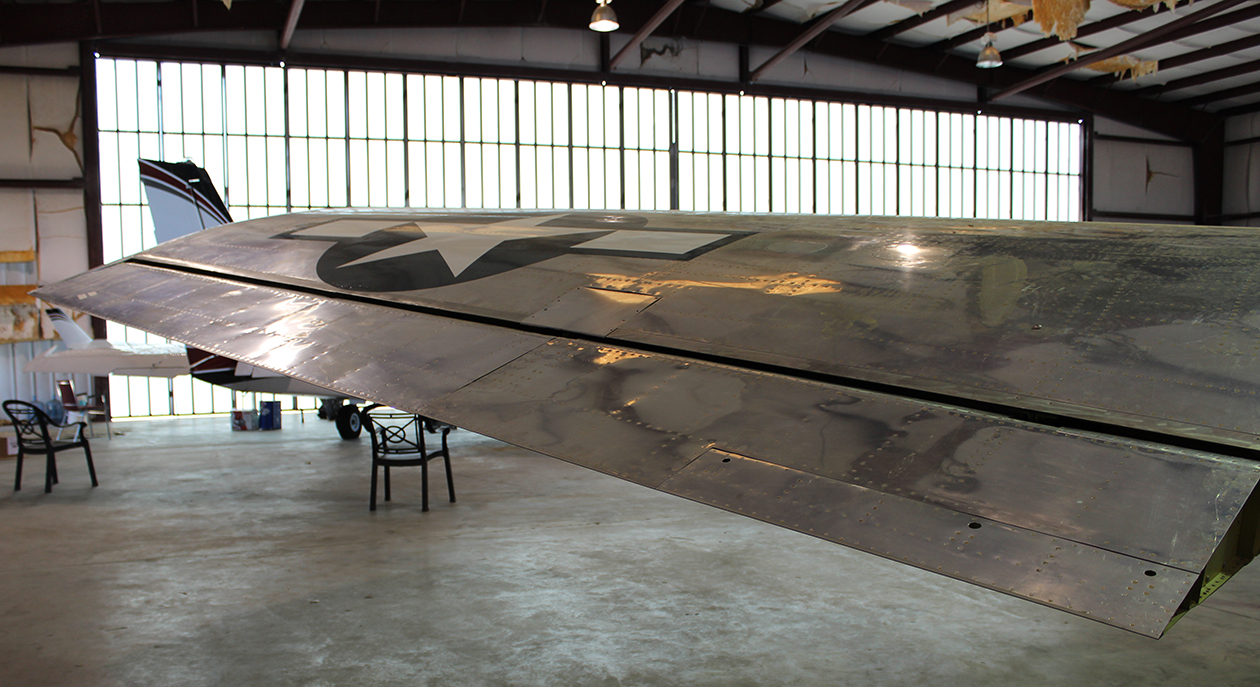
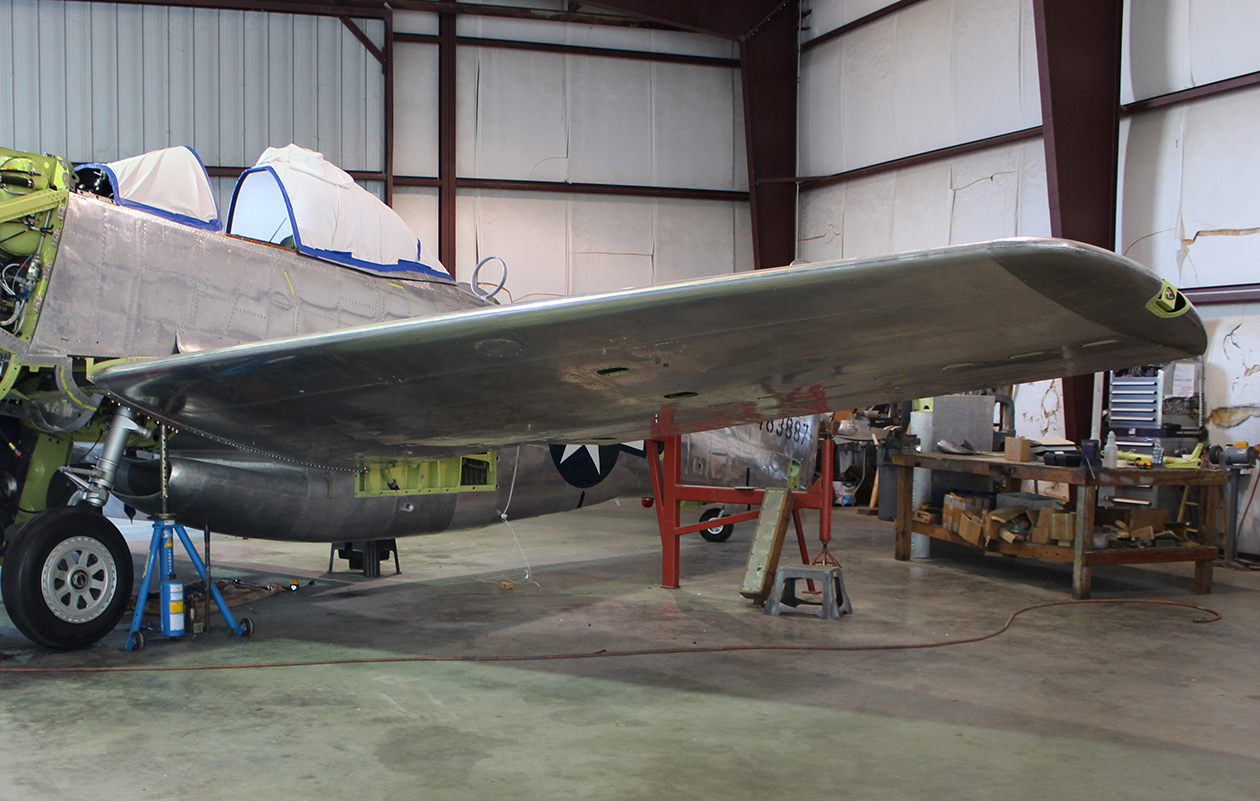
Outboard Wings:
Both outboard wings are now totally bolted down and appropriately torqued. There were 300+ internal-wrenching bolts in all. All of the fuel feed and vent hoses are also now installed. The restoration team filled the tanks with fuel and tested all of the connections and pumps for leaks.
Pitot Static Systems:
The pitot (air speed) and static (neutral air pressure) systems going to both cockpits are now completely hooked up and pre-tested for leaks. A technician from an FAA-approved repair station facility will visit the restoration shop to verify and sign off the required accuracy checks for the altimeter, transponder and encoder (tells ground controllers your altitude, air speed, etc.), pitot instrument and static air going to each air speed indicator, climb and altimeter instruments. Reilly cannot do these final checks and sign-offs himself, as an independent, FAA-licensed avionics facility must perform them.
Engine/Prop Test Runs:
Since October last year, the restoration team pulled the XP-82 outside again twice further for engine and propeller test runs. For each trial, the team would lash each tail to strong tie-down anchored rings, and add sand bags to the top of the horizontal stabilizer to prevent the tail from lifting during hard run-ups.
So far, Tom Reilly has brought the power up on each engine to 1500 rpm, about half power, and test-cycled the props. He will start the prescribed three-hour run-in schedule dictated by Vintage V12s, the company that overhauled the Twin Mustangs two Merlin engines. To date, the XP-82 has clocked 1.5 hours of ground run and system checks on each engine, with no squawks.


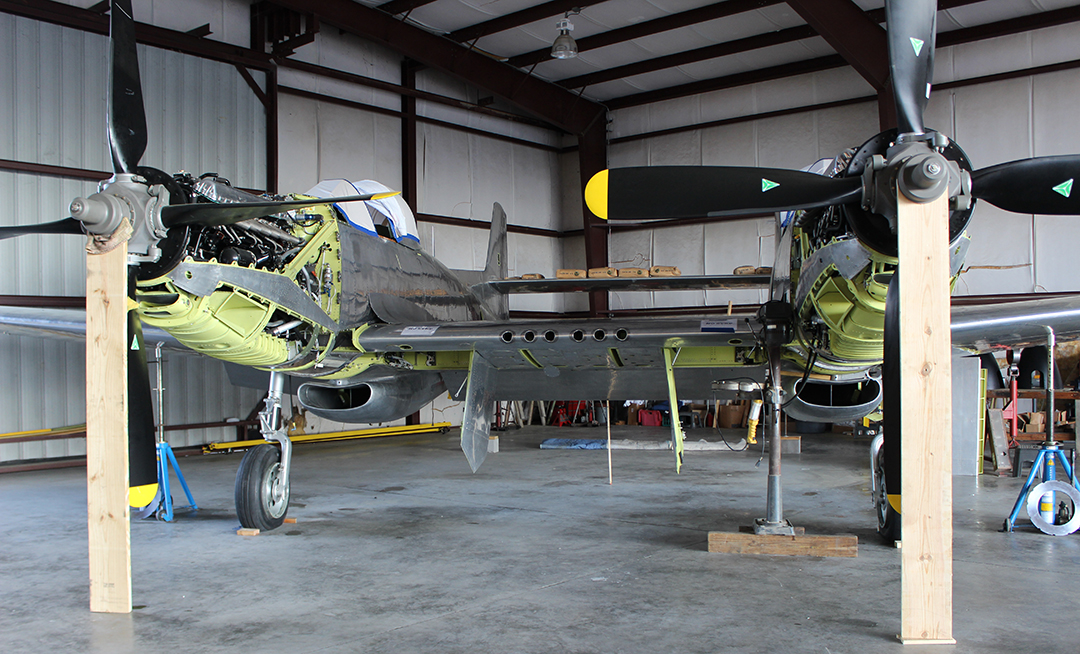
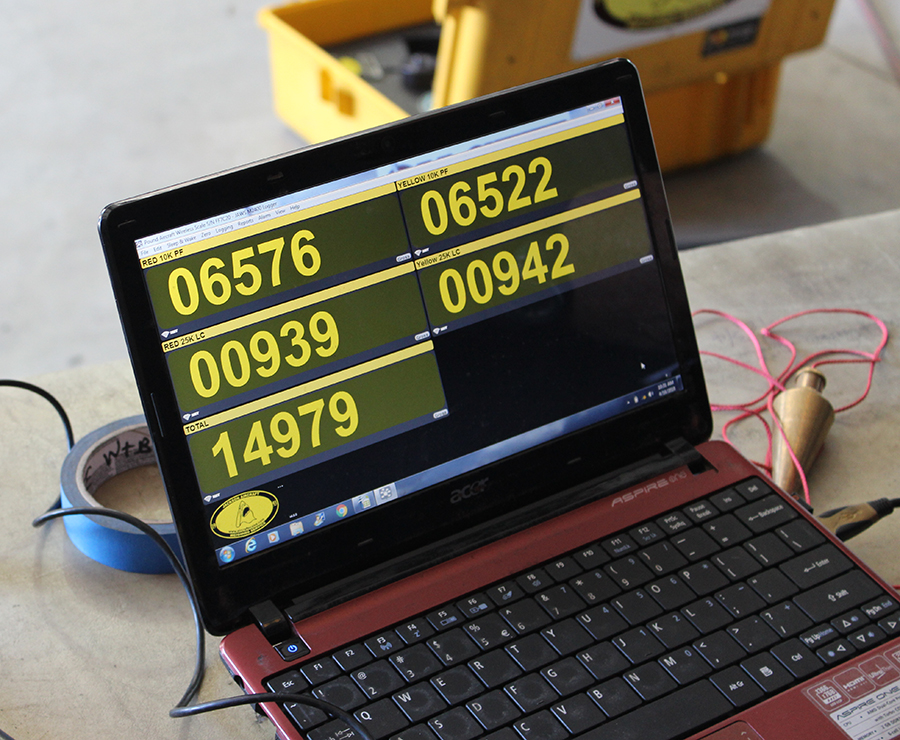
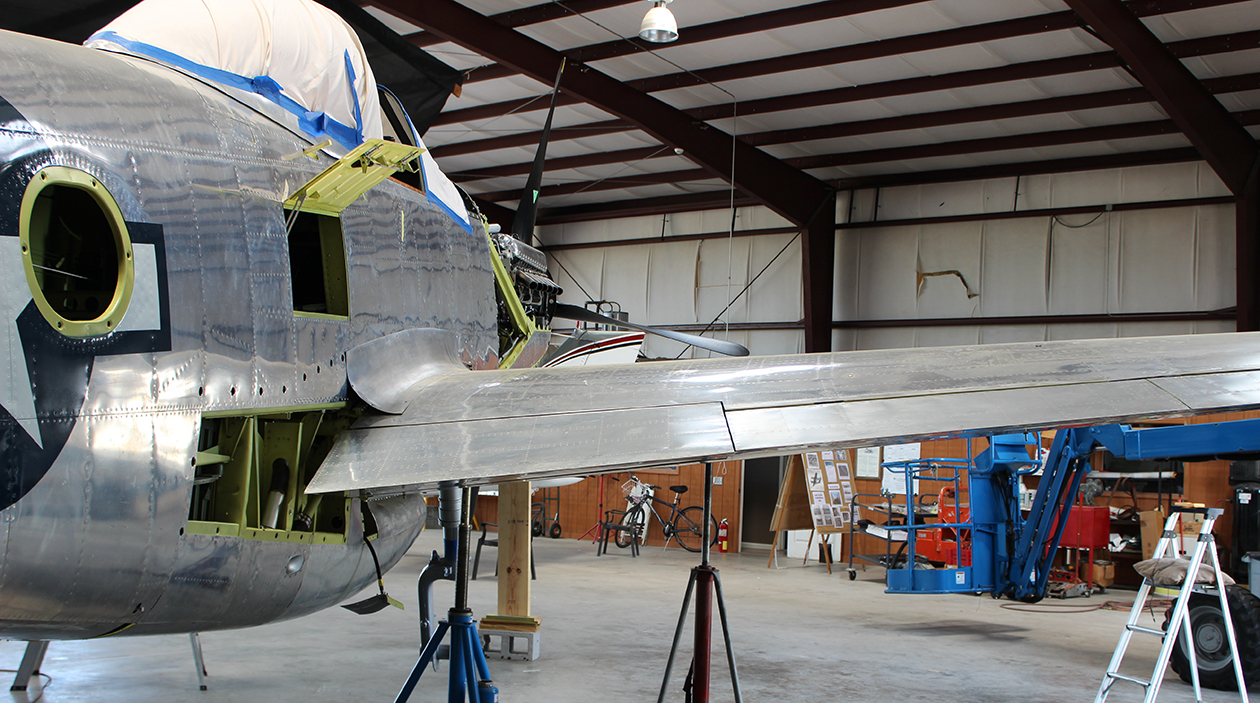
Weight & Balance (W & B):
A few weeks ago, a weight and balance company from Lakeland, Florida came to perform the required W & B on the XP-82. The wood underneath the propeller hubs (in the picture) is not supporting anything; its’s just there for safety to help prevent a nose-over.
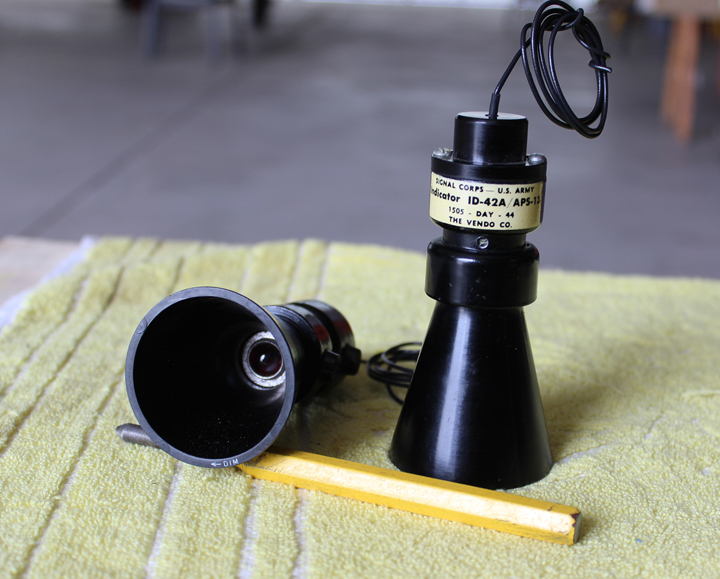
Indicators:
The restoration team was able to locate two NOS ID-42A/APS-13 radar indicators. These were installed just below the pilot and co-pilot’s cockpit glare shields. When the light comes on, it lets you know that an uninvited guest is on your tail!
Items on the “to complete” punch list:
1. After this coming week’s hard two-hour engine and propeller run-ins (no problems expected), the entire XP-82 airframe will be lightly washed down with aluminum etch and a soft Scotch Brite pad to blend out any small scratches. This will highlight the color differences between the three different aluminum alloys that had been used to skin the XP-82. If one looks closely at the original pictures of the aircraft during its first flight, these color changes are definitely noticeable.
2. The restoration team has received the stencils for all of the painted markings that are scattered over the airframe. The restoration team will apply them after the etching process.
3. The XP-82 restoration has consumed in excess of 202,000 man-hours, but is finally in the end-game. So if nothing goes ‘bump in the night’, Tom Reilly hopes to have the Twin Mustang prototype at Oshkosh this July… with time to spare.
And that is all for this month’s report.
Many thanks again to Tom Reilly for this update. You can learn more about the project on their blog HERE. Although we are not exactly sure when the next formal update will come, please be sure to check back with WarbirdsNews in a couple of months for the next installment in the story following the XP-82′s road to recovery…. who knows, the next update may include details of a first flight!
Be the first to comment
Graphic Design, Branding and Aviation Art